3

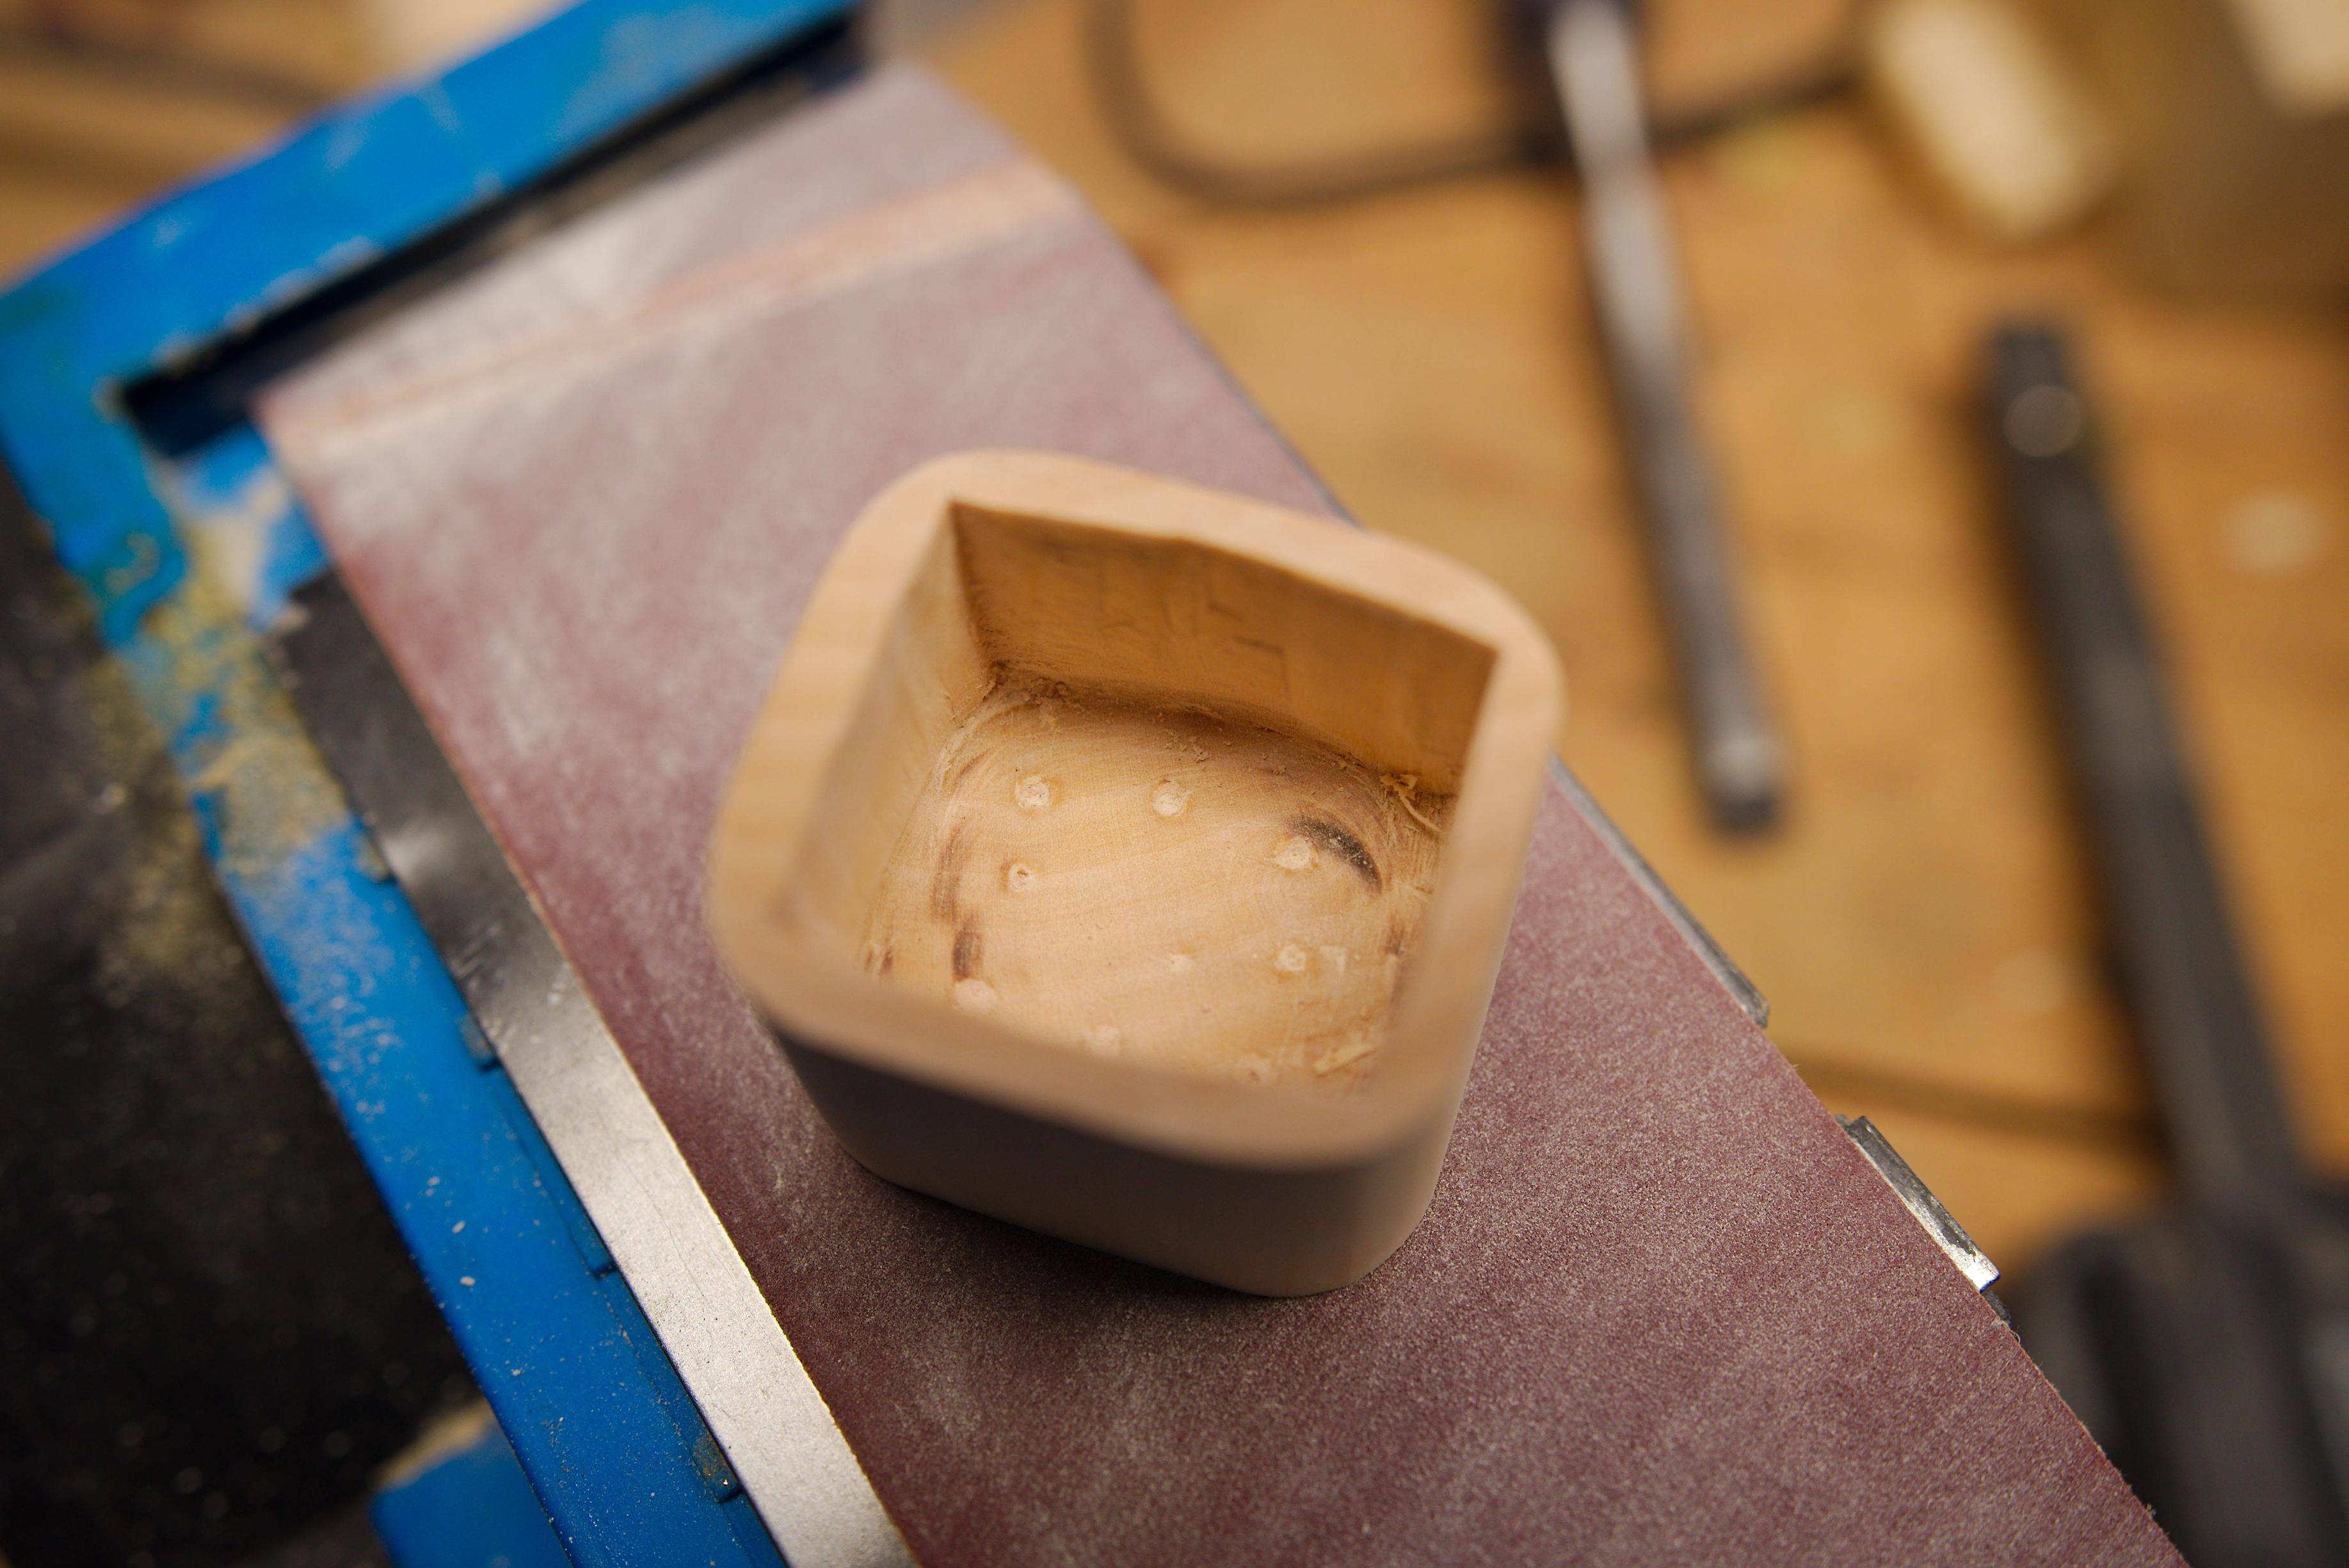
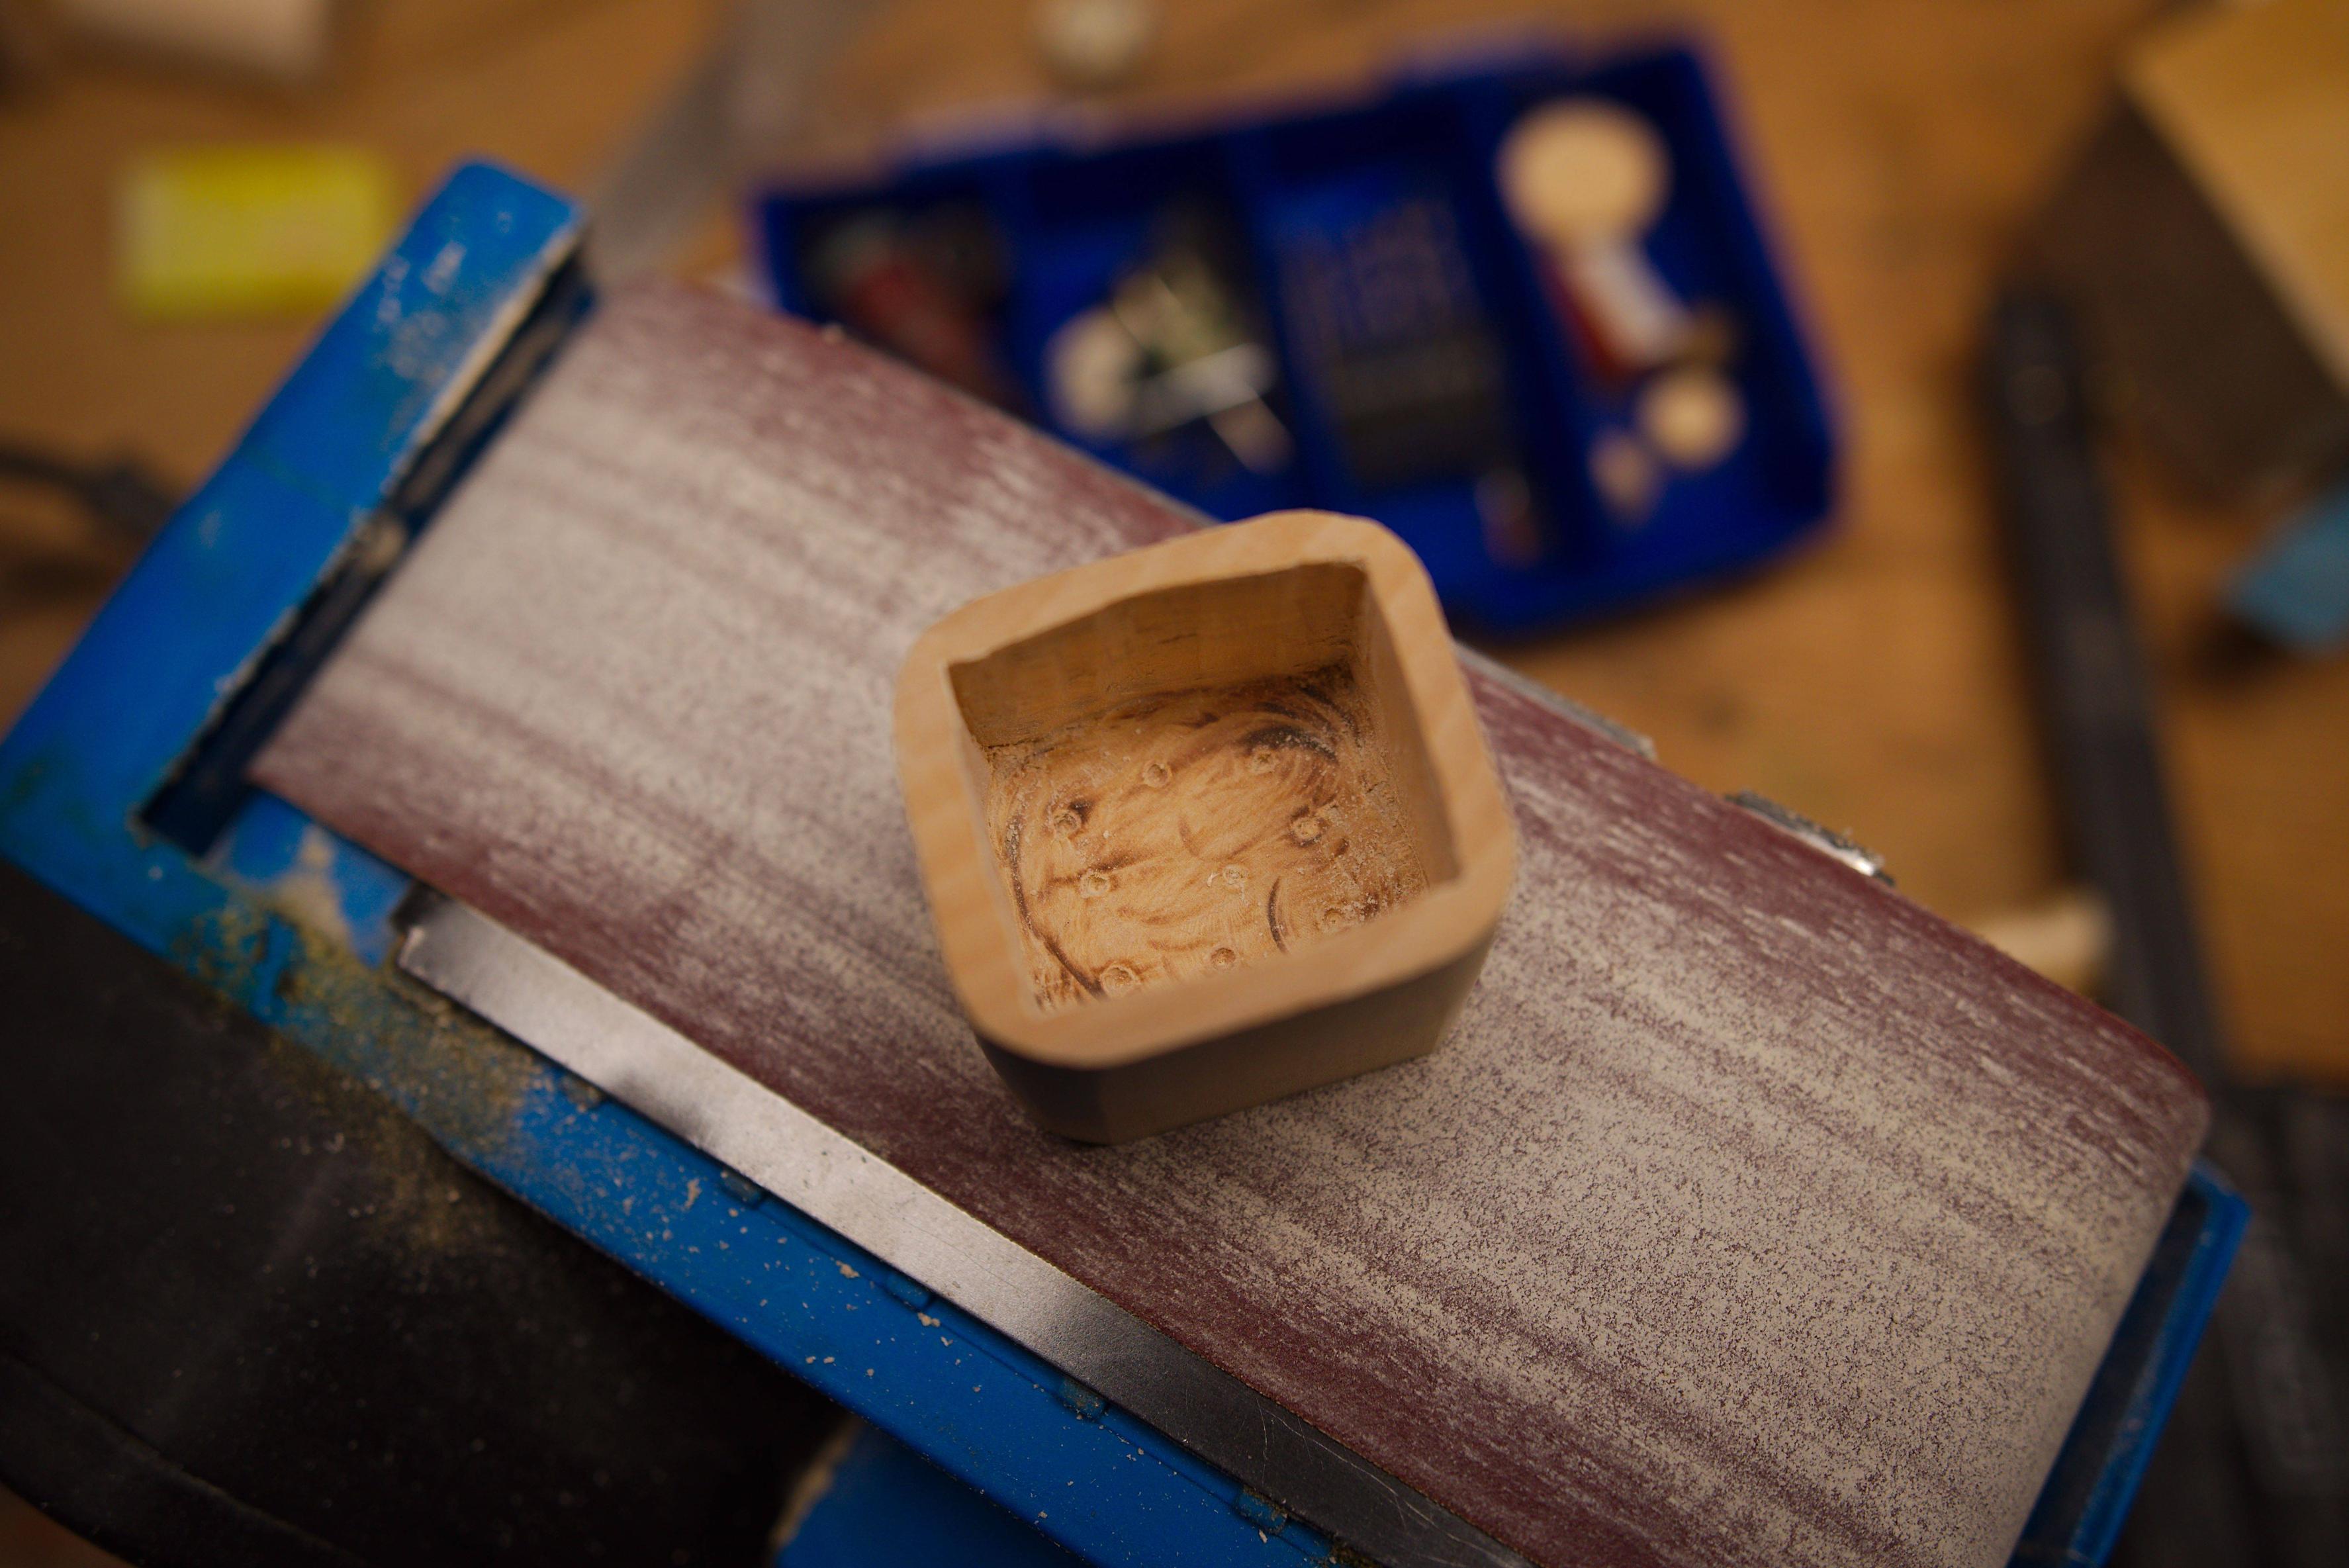
So I've drilled and carved out a small box. The Forstner bit that removed the bulk of the insides left a load of little holes in the bottom. The finish is far from perfect.

enter image description here

I've tried working it with a chisel but we're talking about a very small opening, around 30×40mm. I've also tried a flat-top grinding disk on the Dremel. That's not really gritty enough and spins so fast it just burns.

enter image description here

Is there something else I can use to finish the bottom of this little box?

I don't (yet) have a router but even if I did, I'd need to find an extraordinarily good way to clamp it. I do have a good drill press. I can handle the corners manually.

5
  • Maybe not the greatest approach, but you could cut the bottom off, sand it, and glue it back on. Nasty hack, but depending on how careful you are with the cuts and glue, and what sort of stain you're going to use, it could turn out pretty well. Hopefully someone else has a better suggestion.
    – 3Dave
    Commented Aug 1, 2017 at 17:03
  • 1
    I don't think you're going to be really happy with any smoothing option here so I would strongly recommend you just sidestep the issue and line the box :-)
    – Graphus
    Commented Aug 1, 2017 at 19:30
  • I've hot-glued some 80 grit paper onto the end of one of these Dremel bits. Marginally better but it wears out fast. I've improved the overall finish but the holes are too deep for this approach. Need to remove ~2mm. Still looking for ideas.
    – Oli
    Commented Aug 1, 2017 at 20:54
  • I'm just surprised there isn't a rotary tool for this sort of thing... Like a rasp disc.
    – Oli
    Commented Aug 1, 2017 at 20:57
  • "I'm just surprised there isn't a rotary tool for this sort of thing... Like a rasp disc." There are, there are types of burrs in both HSS and solid carbide that have cuts on the top of them so they can be used like an end mill, but I promise you you won't be happy with the surface they leave.
    – Graphus
    Commented Aug 2, 2017 at 5:56

4 Answers 4

2

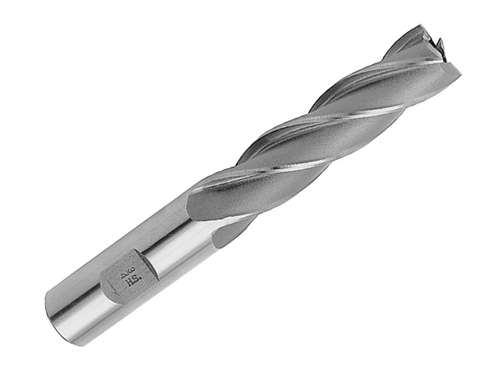
A suggestion of perhaps the wrong tool but a good result nonetheless. A milling machine uses end mills for removing material both from the sides and bottom of a work piece. It is a very bad idea to use an end mill in a drill press to remove material from the sides of a work piece, but not as bad to use an end mill in a drill press to remove material from the bottom. The "bad" part is due to side loads on the drill press, which isn't a factor when using only the end of the mill.

end mill image

You may be able to find low prices online to meet your requirements. Having the stability of a drill press improves your chances of a good result compared to a hand-held rotary tool.

4
  • Ah, good idea. Set a good stop and repeatedly plunge. To Amazon!
    – Oli
    Commented Aug 1, 2017 at 21:57
  • 1
    Re. side loads on a drill, as many practical applications (going back to before most of us were born) support, they're not at all as bad as frequently supposed. Many applications such as buffing, grinding and using as a lathe put consistent and sometimes not light side loads on drills and drill presses and reports of them breaking or wearing out too quickly are thin on the ground.
    – Graphus
    Commented Aug 2, 2017 at 5:53
  • I have attempted milling with a tapered-mount chuck a million years ago and it went horribly. Kept coming lose. Not something you want with a kilo of steel spinning at 700rpm, trust me. I believe my current drill has a fixed chuck so this shouldn't be such an issue. That all said, I can very precisely plunge so that's probably what I'll end up doing.
    – Oli
    Commented Aug 2, 2017 at 7:58
  • 1
    So I tried this with two types of mill bit. The first was a two-flute "slot drill" where the flutes meet in the middle. Dr Google told me I wanted this if I wanted to plunge. This did a great job at removing wood. Then I moved onto a 4-flute end mill, as displayed and took another fraction of a millimetre off. Results: imgur.com/a/KVifS I'm happy. It's not perfect but it's acceptable. Some hand-sanding will get this to the finish line.
    – Oli
    Commented Aug 3, 2017 at 20:20
3

Paul Sellers has a video on making a Poor Man's Router Plane using a chisel and a block of wood. Depending on the depth of the box, this method may work for you.

NOTE: I take no responsibility for sending you down the Paul Sellers video rabbit hole. :)

1
  • Long time subscriber of Paul. Unfortunately there's not quite enough room for this sort of angle. The sides are higher than the photo suggests.
    – Oli
    Commented Aug 1, 2017 at 21:07
3

I'm going to expand somewhat on my Comment above.

Hide it
I don't think you're would be really happy with any smoothing option here so I strongly recommend you just sidestep the issue and line the box :-)

This isn't the cop out it might appear to be, small decorative boxes are commonly lined in various ways (baize, flocking, rouched fabric) and it finishes off the interior nicely. Certainly more attractive than a bland wood surface!

Thinking outside the box
The box bottom doesn't have to be a single piece with the sides.

Drill out the current bottom, or cut it out with a coping saw, and throw it away. Smooth off the sides with files (or sandpaper glued to sticks if you own no suitable files) and when you're happy with them you make a new bottom.

Mark through the hole onto the face of a board then cut it to shape and glue it in place. The new bottom can be a matching or contrasting wood as you prefer.

In addition to working around the current problem without having to make any more purchases, and struggling to refine a difficult-to-work surface in a difficult-to-access position, the bottom of the box will become a long-grain surface and not end grain as it currently is. End grain doesn't finish well that easily but long grain does. Additionally long grain is frequently more attractive if you want the bottom of the box to be wood and to be visible.
1
  • +1 These are definitely options I will consider if all else fails. I'd obviously be looking at these (or just better box construction techniques) if this were a production run, but at this point, it's as much an academic curiosity to make me a better woodworker. But FWIW, the end-grain on this finishes beautifully anywhere above 200 grit. A less dense softwood might feel worse.
    – Oli
    Commented Aug 2, 2017 at 9:19
1

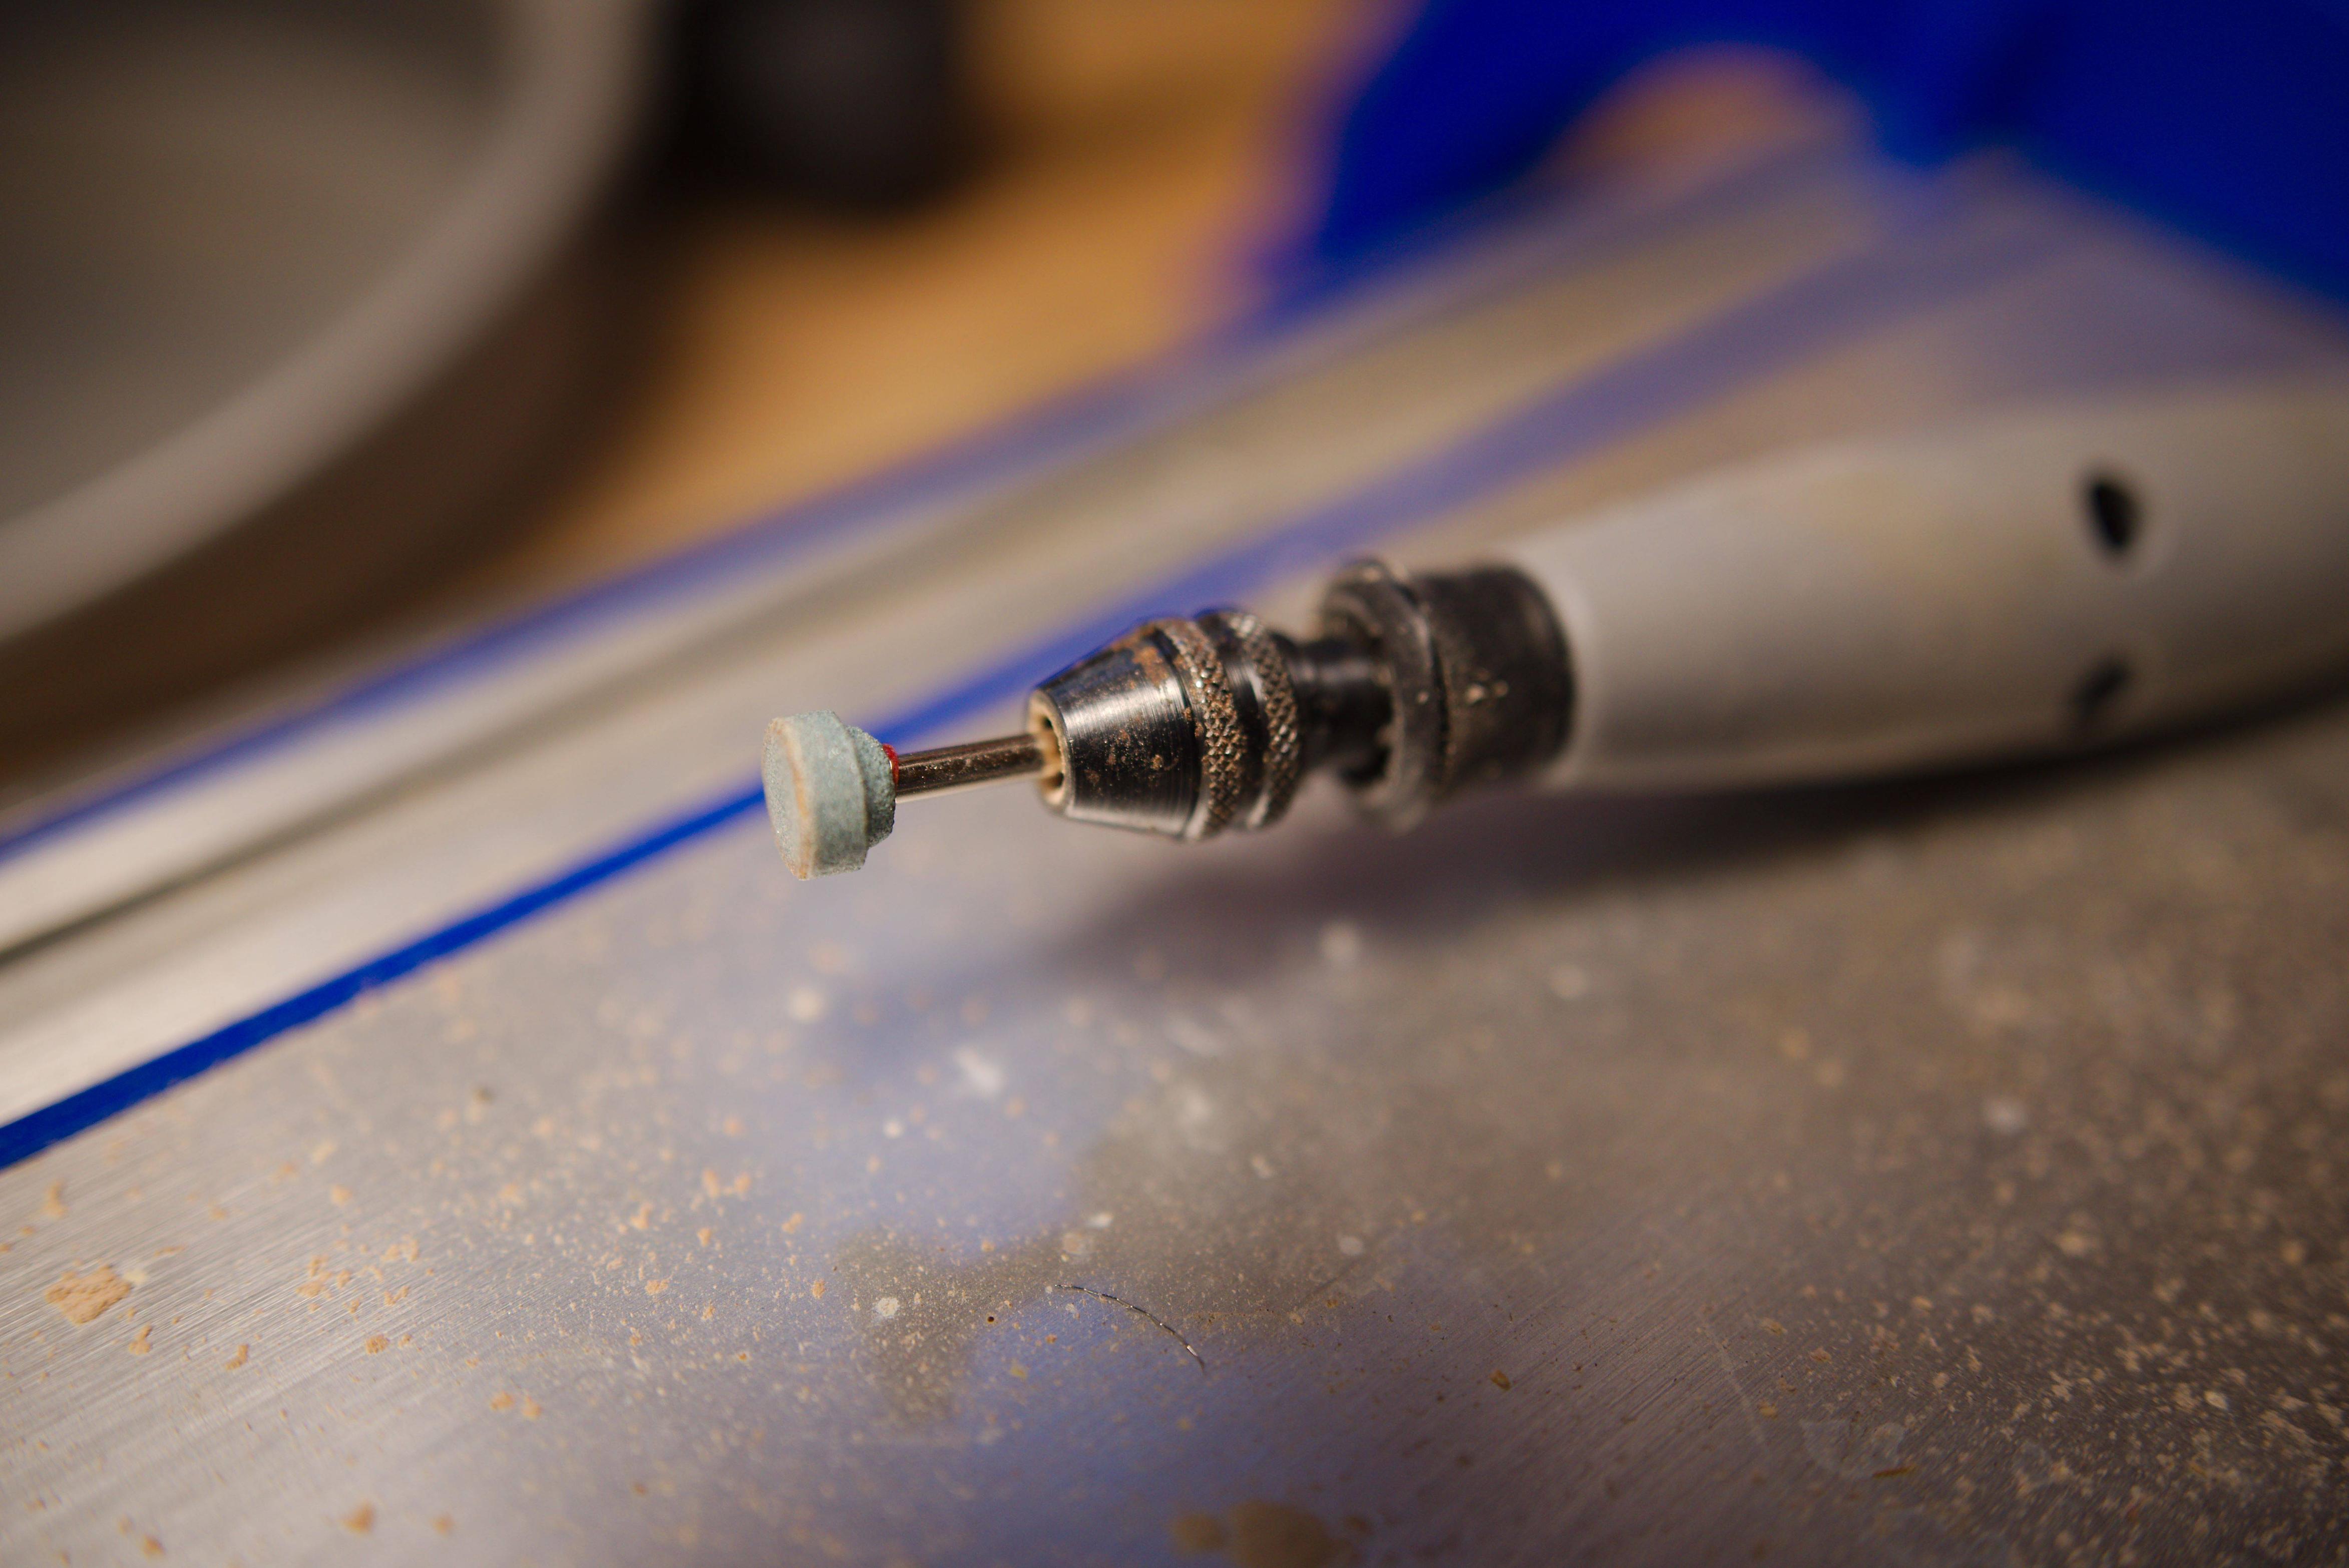
You can take a flat-end Dremel bit and hot glue sandpaper to it. Here's what 80-grit does:

enter image description here

The problem with this approach is a little ~2cm² disc of 80-grit can't wear away enough of the wood to hide the holes before it gives up the ghost. I could rinse and repeat but it also wears into the sides so it's not something I want to push too far.

The finish is much better so this is definitely an option later on, and with higher grits to get a polished bottom.

Your Answer

By clicking “Post Your Answer”, you agree to our terms of service and acknowledge you have read our privacy policy.

Not the answer you're looking for? Browse other questions tagged or ask your own question.