1

I have a walnut table from Room and Board that I love, but after ten years it was quite scratched up and the finish was lifting in places. I have never done this before, but after not being able to find a refinisher, I decided I would try to resurface it myself with Rusten's Danish Oil after watching some youtube videos that recommended this finish (and this process).

First sanding: 40 -> 80 -> 120 -> 150 grit using a random orbital sander Left a thick coat of oil on for 30 minutes, recoating the areas that were drying out and then wiped off excess Let dry for a day and as expected, the grain rose and it was quite rough to the touch.

Second sanding: 220 grit with an orbital sander and then a manual sanding block (with the grain) Left oil on for 30 minutes, recoating the areas that were drying out and then wiped off excess Here's where I first noticed some uneven-ness in the look of the wood, and I was wondering if that was just what it was supposed to look like or whether some of the wobble in the orbital sander had given me an uneven depth?

Let dry for two days. It was mostly smooth to the touch after this, but there were some areas that were rough to the touch.

Third sanding: 220 grit / manual sanding block with the grain Left oil on for about 15 minutes, recoating the areas that were drying out and then wiped off excess. Let dry for about four days - noticed that I hadn't done a good enough job wiping off excess and there was some build-up of oil splotches in places. Smooth to the touch after this. Finish wasn't quite as uneven as before, but it was still quite noticeable.

Fourth sanding: 400 grit/manual sanding block with the grain Left oil on for about ten minutes, recoating the areas that were drying out and then wiped off excess. Let dry for five days. It was very smooth at this point, but the finish still looked uneven.

Fifth sanding: 400 grit/manual sanding block with the grain - wet sanded with a thin coat of danish oil Left oil on for about ten minutes after sanding, wiped off excess. Let dry for two days - buffed using a buffer and a lambswool disc.

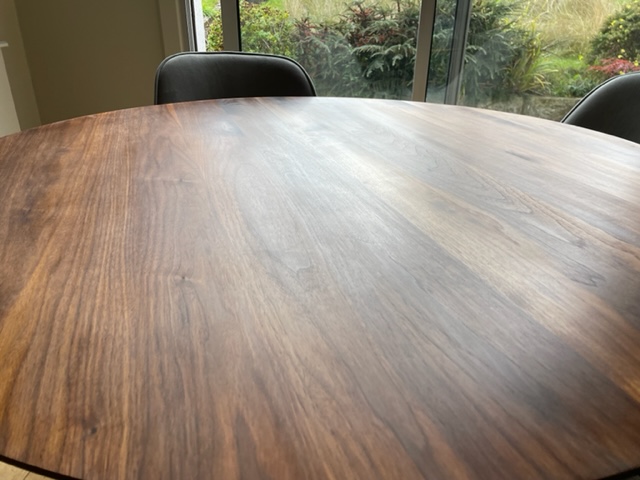
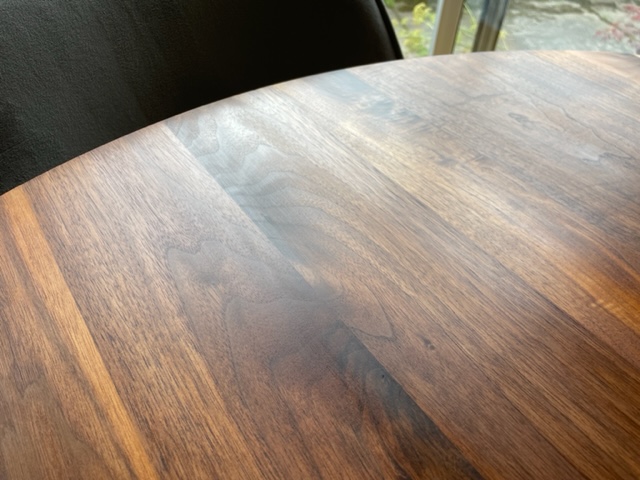
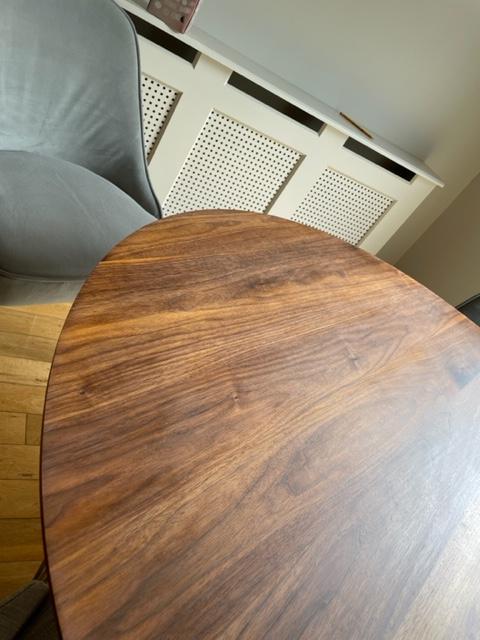
Now, it's glassy smooth to the touch, but blotchy in places (photos) and I don't know how to fix it. Should I try adding a polyurethane top coat or a wax? Or do I need to go back to step two and do a thorough sanding starting back at a 120 grit to even out the finish?

(Or is this a perfectly acceptable amateur finish?)

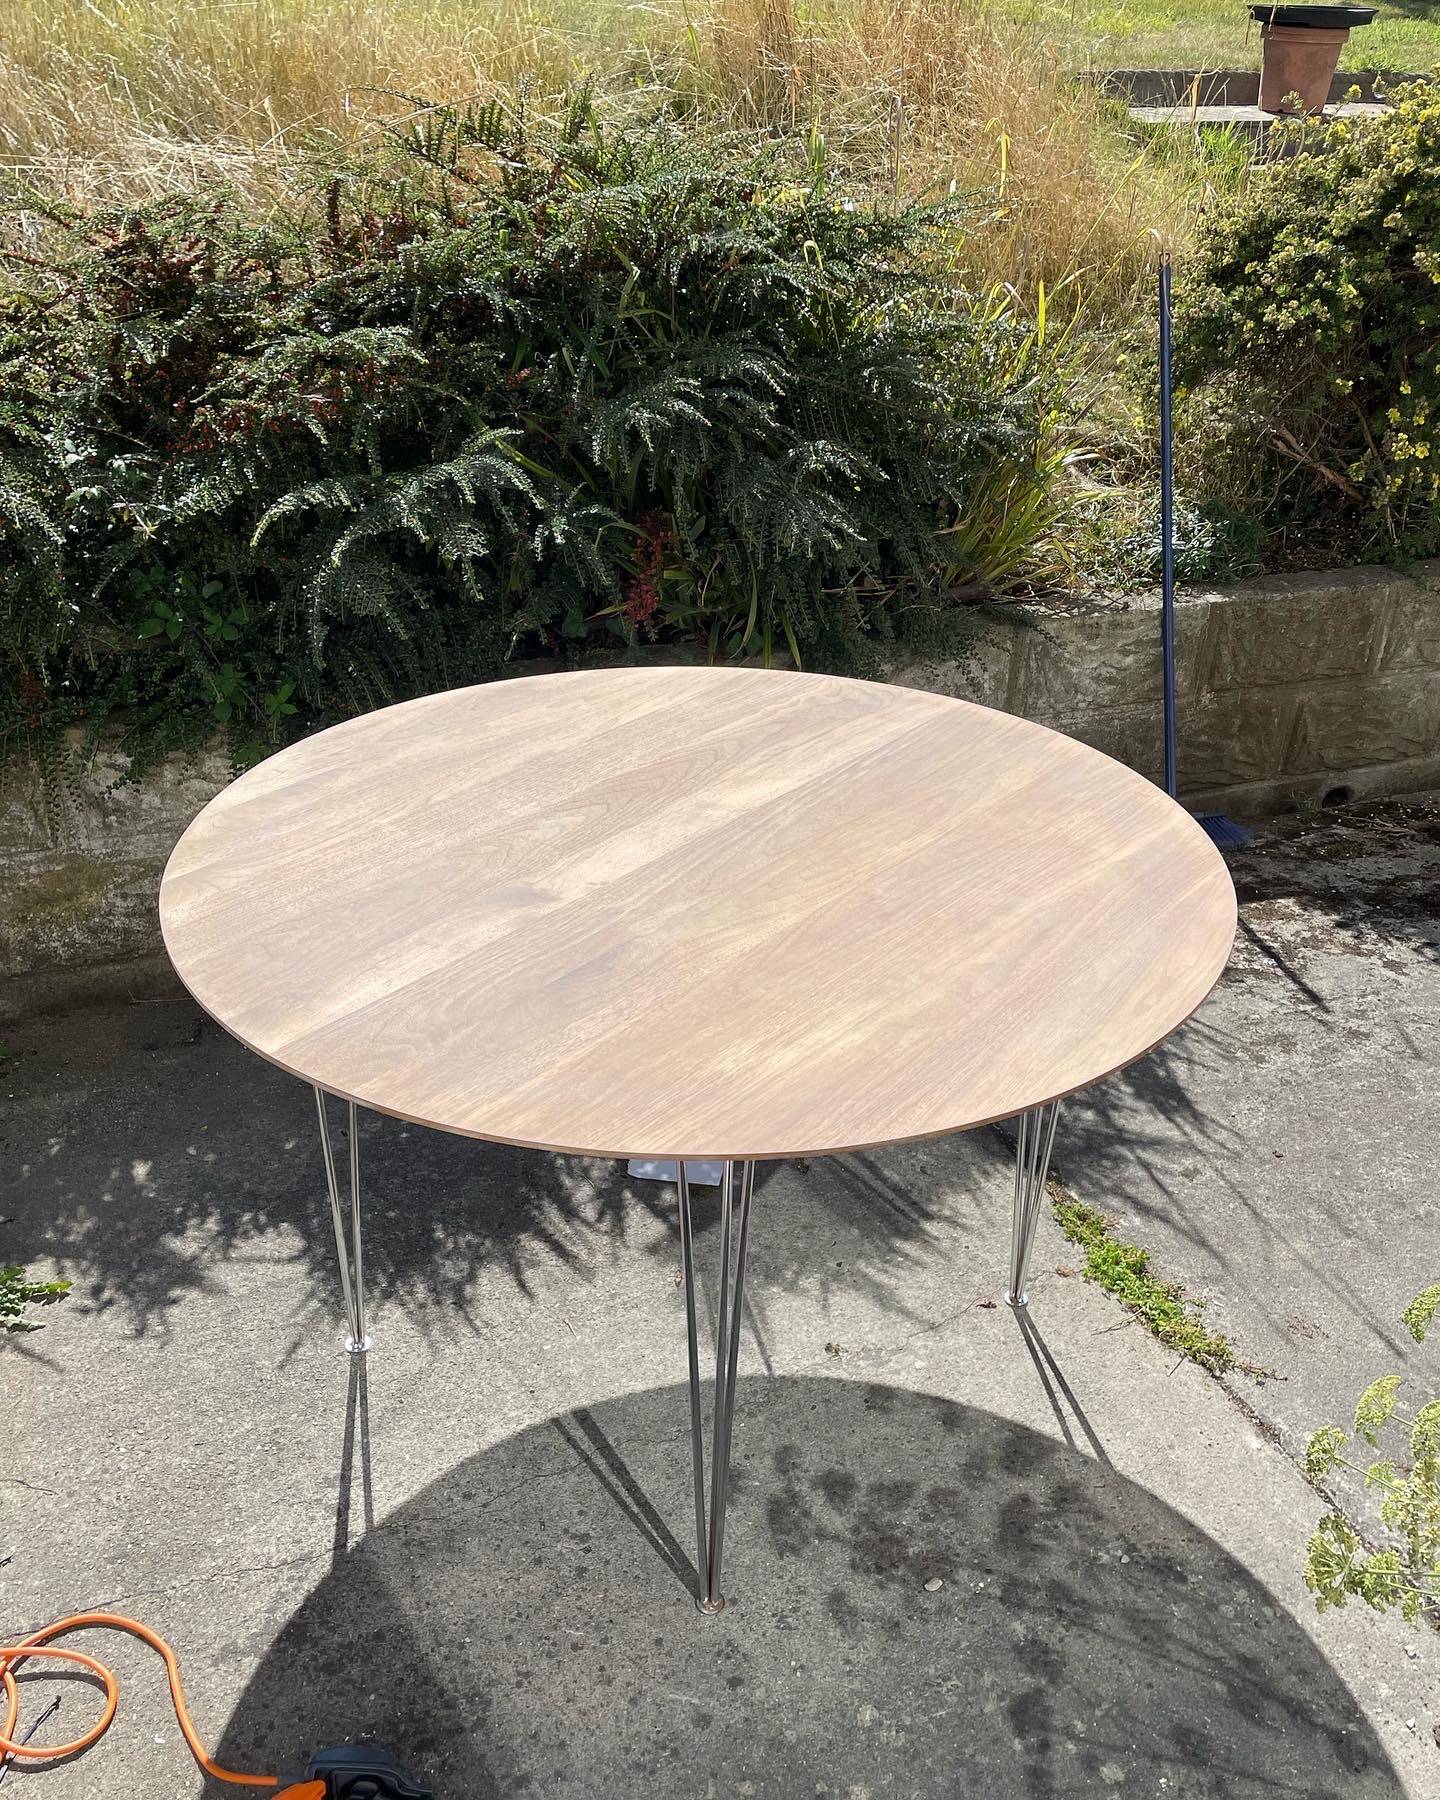
Update: Here is the table after initial sanding - I think I got all the original finish off. enter image description here
enter image description here enter image description here enter image description here

5
  • 1
    Hi, welcome to Woodworking. We can't tell from the photos for sure whether this is made from boards, or the appearance of boards was achieved using veneers. Which it is slightly complicates matters. Doing this with veneers would be silly, but modern furniture is full of this sort of silliness. So anyway, fundamentally I think there's a possibility the first step in the process was where there was an unexpected hurdle — whether you removed all of the original finish. With penetrating finishes such as "Danish oil" it's generally vital to remove every trace of finish before starting.
    – Graphus
    Commented Sep 13, 2022 at 18:38
  • 2
    It's not clear if the initial sanding steps were for this purpose but just to repeat something that I've said many times here in case you didn't see it in a search, sanding is by far the worst way to remove existing finish. All the other common methods are to be preferred, with sanding in distant last place.
    – Graphus
    Commented Sep 13, 2022 at 18:40
  • Thanks for the pointers. I did not realize that sanding was the worst way to remove an existing finish (which was some kind of varnish). The table-top is made with walnut boards you can see the end-grain all along the edge and I sanded into the glue line in one little section. I think I might try a few coats of wipe on polyurethane to see if that can even out the finish before sanding back to bare wood. Commented Sep 13, 2022 at 20:24
  • 1
    Actually using wipe-on (homemade) is what I would have suggested as a better alternative anyway :-) While sanding-in methods to apply penetrating finishes can certainly work, to a degree it's attempting to reproduce what varnish can give you automatically so to speak (because of the higher build) but requiring more work, and yielding a noticeably less durable finish (both to water and esp. to scratching & scuffing). Anything you might have read about how varnish, particularly poly, yields a "plastic look" is basically nonsense from people who don't properly understand what can be achieved.
    – Graphus
    Commented Sep 13, 2022 at 21:18
  • 1
    I was going to include my alternate, and I think superior, finishing plan at bottom (basically covering doing this entirely using wiping varnish) but it felt a little shoehorned in, and made the Answer very much a TL;DR so I edited it out. If you're interested in something like this please feel free to ask a new Q on this topic so I can post this as a standalone Answer.
    – Graphus
    Commented Sep 19, 2022 at 17:55

1 Answer 1

1

What you have up to this point looks to be a perfectly reasonable stage to continue the finishing process. It's a shame the steps followed weren't enough to produce an acceptable result (as they probably should have to be fair) but it is what it is.

You can continue with Rustin's Danish Oil but my immediate thought was to suggest switching to varnish, which you already floated the idea of anyway.

Should I try adding a polyurethane top coat or a wax?

I think yes, and absolutely no1.

There are a number of advantages to switching to varnish, and basically zero downside. First improvement is that varnish builds better than blended finishes such as "Danish oil", so it inherently tackles areas of varied surface finish better. Second is that it will provide a more durable surface at the end of the day, possibly substantially more durable2.

I'd advise using wiping varnish for this, homemade by preference. Wiping varnish is virtually impossible to screw up and while the build is way slower than varnishing more conventionally the advantages completely trump this.

Update: Here is the table after initial sanding - I think I got all the original finish off.
Sure does look like it. But you simply can't tell from the dry appearance.

This is why it's good advice to always — always — confirm this by wetting the surface.

When you wet a surface that doesn't have all the original finish removed you can tell instantly — paler zones or spots quite literally aren't being wet equally and stand out like a sore thumb. If this is found more stripping, scraping or sanding are needed.

While some prefer to use an alcohol, white spirit (mineral spirits) and even lacquer thinner for this diagnostic wetting I think there's a good reason to use plain water, starting with precisely the reason that some use something else — because it will raise the grain3.

By using water you accomplish these two things in one step; it's also the cheapest and least noxious solvent to boot, so there's that.

Plus, because of its higher surface tension water beads up where the other liquids don't and this can provide valuable additional info on areas where some finish remains within the surface wood fibres (which isn't in the least uncommon).


1 If you apply wax now but then discover it didn't do enough to even up the visual depth and/or the surface finish you've set yourself up for a problem, because nothing else can go over wax. So to then try any other option you'd have to scrupulously remove the wax.

2 Since the application processes for varnish and blended finishes can be exactly the same I've basically ditched all blended finishes similar to "Danish oil" for anything important — equal or better looks, better scratch and water resistance, with zero additional effort and basically in the same timeframe? What's not to like?

3 And when aiming for a close-to-the-wood look I think pre-raising the grain is the way to go, rather than have this in any way complicate a stage of finish application.

Your Answer

By clicking “Post Your Answer”, you agree to our terms of service and acknowledge you have read our privacy policy.

Not the answer you're looking for? Browse other questions tagged or ask your own question.