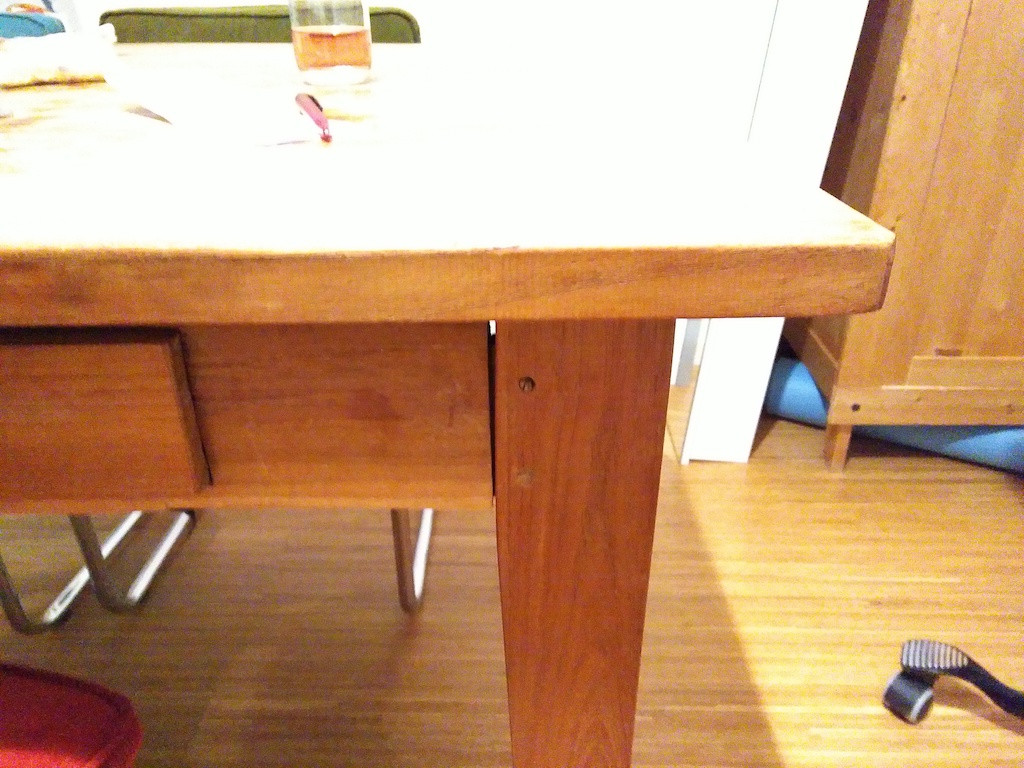
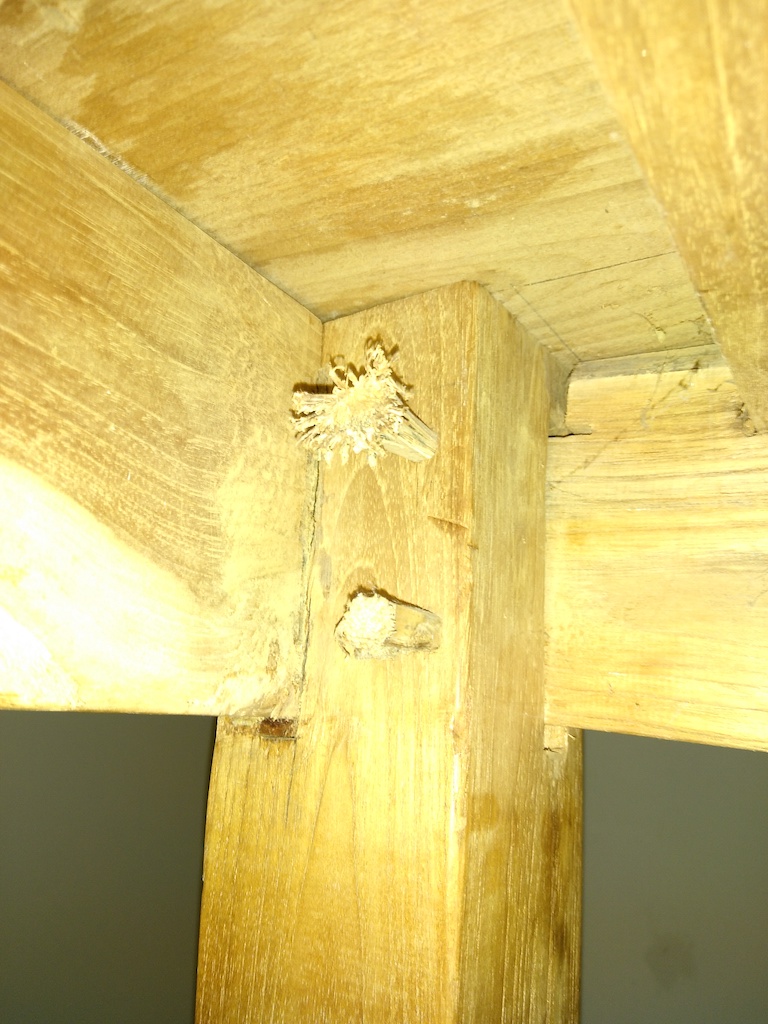
Those are some pretty badly fitted mortise and tenons. Ideally, the mortises and tenons are tight enough to require taps from a mallet to seat them. Though, I wonder if the maker did this to allow for radical expansion in the tenons? (Even so, this amount of slop is overkill.)
Do you happen to live in a very humid place?
This table is built such that racking forces stress the pins in exactly the right way for them to fail, and as a comment suggests, you probably have a case where one or more of those pins are very weak, or are snapped completely.
A proper carpentry fix would be to remove the pins completely, assess the voids to make sure they are still viable, and go from there with new pins (which may actually be cone-shaped). If the holes aren't good anymore, and cone or straight pins don't tighten things up it may be necessary to close up the holes in the tenon and refit them using the mortise holes as guides. Or add another hole for a new pin.
Maybe some wedges for the tenons, as well, to keep racking forces moving those leg tenons, causing the same failure again.
As pointed out in the comments, there is nothing wrong with using metal brackets or mending plates (or wooden cleats, if that is easier). I'd recommend seeing if you can find some of those Ikea-style brackets that connect adjacent legs, as that will really stiffen things up. But if all you can find is 90-degree plates, make sure they have quite a few offset holes for wood screws.
The screws will eventually pull themselves out from racking forces, but as a stop-gap it'll be fine.
- Flip the table upside-down.
- Cut the ends of those dowels flush on inside. They should not be proud (sticking out) at all, ideally.
- Using a mallet (or a hammer and a piece of scrap) tap the outside of the legs so the tenons are jammed as closely into those mortises as possible.
- Screw the mending plates in, but only on one side so the leg is allowed to move.
- Using a tape measure, find the distance on the diagonal between the outside edge of each set of two legs. We want this to be the same so that the legs form a reasonable square.
- I don't know if these legs are intended to be square (at 90 degrees) to the table top, but the idea is that you adjust the legs so that they agree with each other in terms of the angle to the table-top, and the diagonals you measured above are as close as you can make them.
- Drill your pilot holes, using the plates as a guide, and the drive the screws in snug, going around from leg to leg to snug things up evenly.
Some other notes:
- Try to find quality wood screws. A real wood screw has a shank that has a gap where there are no threads near the head, and rounded shoulders. This ensures that they snug fully down to the shoulder for maximum grip.
- Drill pilot holes for the screws.

