9

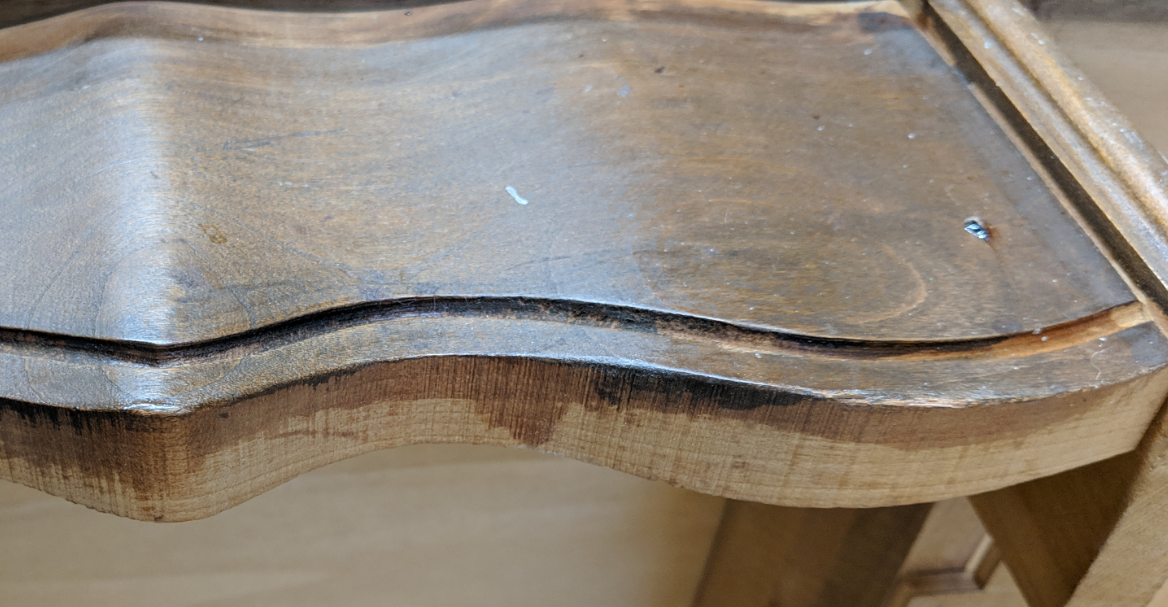
I'm trying to build a replacement for a coffee table drawer that went missing years ago. I remember the drawer front matched the profile of the skirt on the table, so I was able to make a template from the other side and reasonably match it with a band saw and belt sander.

However, I am stuck on how to cut the groove that is parallel to the curved edge. I'm not sure how I would go about cutting that groove since it has to follow a 3 dimensional contour. If it was straight it would seem like maybe a job for a router plane with a fence, but the only ones I have seen wouldn't work well on a curve like this.

What tool or technique do I need to cut a curved groove like this?

enter image description here

(Update)

Follow up:

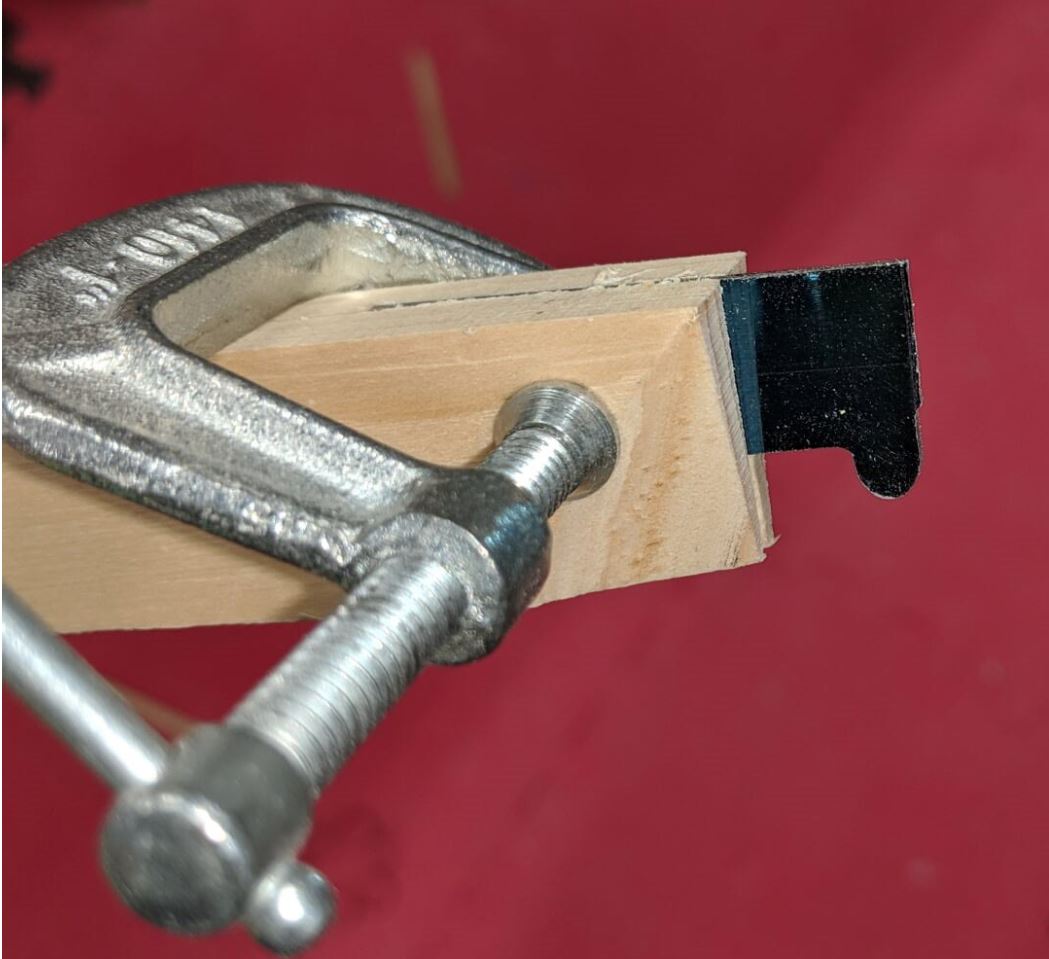
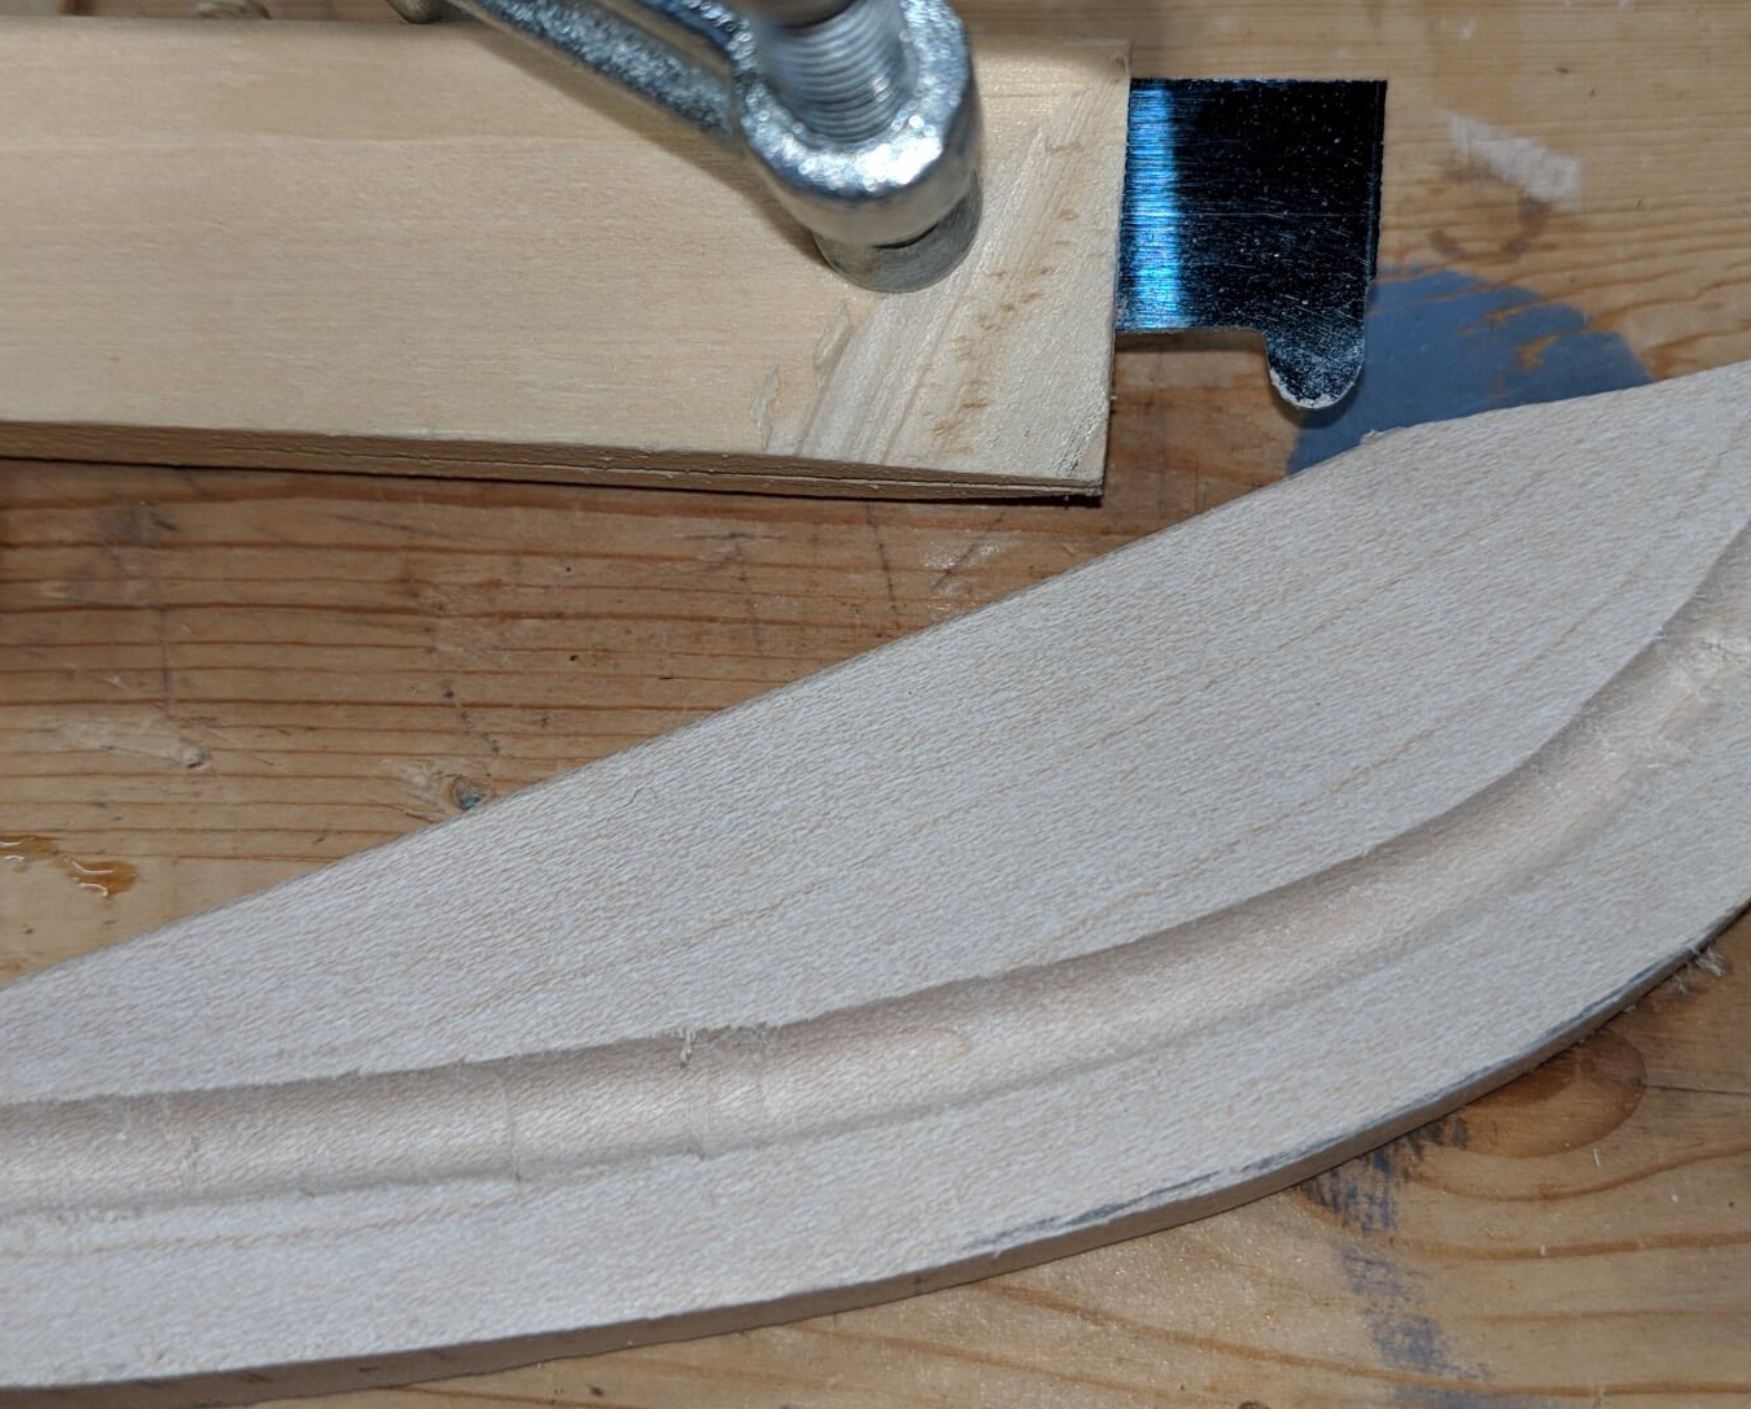
I ended up making a rather unsophisticated scratch stock with some "blanks" I found on Amazon, a piece of scrap wood from the bin, and a mini c-clamp. I just rough beveled the end, cut a groove down the middle, shoved the blade in it and clamped it in place.

It somewhat worked on a piece of scrap, cutting well in the areas where it ran with the grain, but choppy and hard to control as it cut across the grain on the hard maple. I'm sure a better edge and more practice would help. I didn't smooth the edge any better than what you get with a diamond file.

Once I iron out the bugs, I think this will do the trick. Thanks to those who suggested it.
Scratch Stock Test

4
  • 1
    Manually you could do this with a scratch stock, either one made to follow curves or modified to do it. Using power tools, this kind of thing is a snap for a router (and would be far, far faster as probably goes without saying). Is the groove round-bottomed or flat at the bottom? Doesn't matter much either way, I'm just curious.
    – Graphus
    Commented Mar 24, 2019 at 19:56
  • At first I thought it was flat bottomed, but on looking closer I think it's actually rounded. I'm not opposed to using a power router, but I'm not sure how I'd do it to get the varying depth of cut to follow the elevation change. Oh, and thanks for the "scratch stock" tip. That's a new term for me so it gives me something new to look at. Commented Mar 25, 2019 at 0:15
  • Welcome. There's a bit on scratch stocks in this previous Answer but lots more info on them out there on the web if you want to know more. Not for this task but more generally, Garrett Hack's re-imagining of the scratch stock is particularly worth a look. For this you'd want to use a wide-fence design + modification to run against a curved edge, similar to how marking gauges are made for the same purpose — with two bearing points.
    – Graphus
    Commented Mar 25, 2019 at 7:17
  • Sorry I completely spaced on their being an elevation change! Can't imagine how I didn't see it, it's so obvious now. Although I think any tool with a small enough base should ride the curve well enough it certainly complicates things and would make it more difficult to ensure a good result.
    – Graphus
    Commented Mar 25, 2019 at 7:20

2 Answers 2

6

This is a tricky one! After thinking on it awhile, here's how I'd do it.

I'd use a scratch stock, with the fence part modified to follow curves.

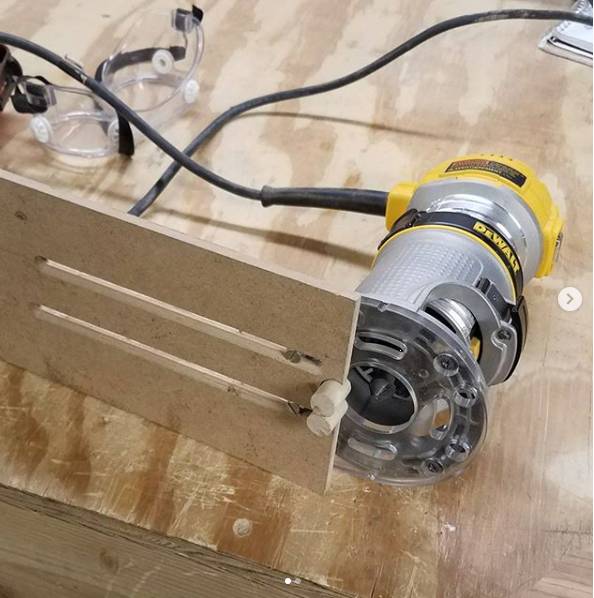
I've never done this with a scratch stock, but I have done a similar thing with a router. Here's a picture of a curve-following base I built for my trim router:

Curve-following router base

Image credit: Charlie Kilian on Instagram

(Apologies for the quick-and-dirty construction; this was a case where ideas I was prototyping never got rebuilt as a final jig.)

The important part here is the fence made of two dowels. The base acts like a normal edge guide, except instead of a straight fence, the two dowels allow it to contact any point on the curved edge while still being held parallel from it. To use it, you use the dowels as a guide, keeping them both flat against the curve as you move the router. The curve of the dowels contact the curve of the work piece at only two points (one on each dowel), allowing the router to turn with the curve. The distance from the router bit to the dowel fence determines where on the work piece the router cuts.

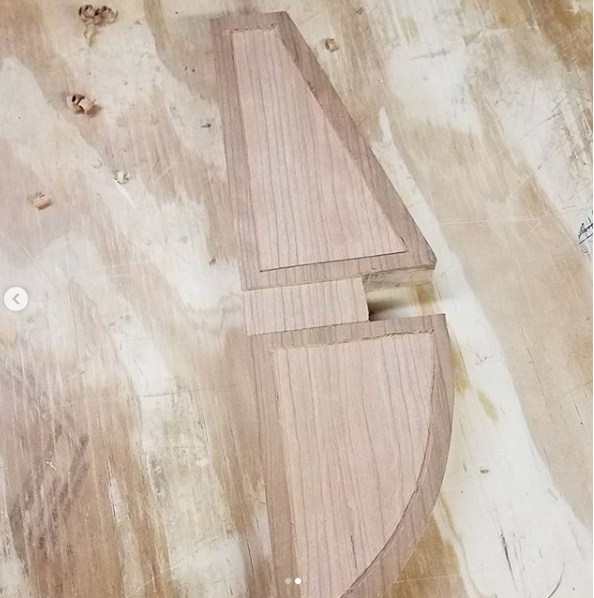
I used the base above to cut the curved profile of this line:

Curved work piece with relief cut by router in a curve-following base

Image credit: Charlie Kilian on Instagram

(In case there is confusion on this point: In the example above, I used the router in the curve-following base only to create the profile of the curve. The flat bottom of the large recesses were cleaned out using a router plane to sneak up on that profile.)

This technique handles the curved bottom of your drawer, but it does not account for the curves on the face. This is why I would adapt this technique to a scratch stock, instead of using a router. The flat base of the router will make it hard to control the depth of cut as it moves over the curved face. Though it will take longer, a scratch stock will give you much finer control.

Modify the scratch stock's fence to have two dowels on either side of the cutter, similar to how I put two dowels on either side of the router bit. As you use the scratch stock, keep both dowels in contact with the drawer bottom, and it should follow the curve. As a bonus, since it will take many passes to carve the profile, a mistake on one pass isn't as catastrophic as a mistake made with a router.


If you decide to use a scratch stock, here's some solid advice on how to make a cutter.

2
  • After watching some YouTube videos and looking at the linked pdf, I think making a scratch stock is probably within my skill level, though I might need some better files. The hardest part will likely be cutting the profile in to the steel. Good idea on the dowels. I was trying to think of the best way to make the fence. Commented Mar 26, 2019 at 0:06
  • @SteveInCO, if you check out the link I posted above in a previous Comment there are basically plans for various scratch stocks you can build from. The one top-right is the one you want to build. Re. cutting a profile, I don't think you need a profile here per se, you just want a cutter of a given width held X distance from the fence, with a slight curvature to the edge right? Although files would be useful once you have your piece of steel (which can be hacksawn from the tip of a saw blade if necessary) the bottom edge can be shaped entirely on sandpaper or sharpening media if need be.
    – Graphus
    Commented Mar 26, 2019 at 6:48
3

Honestly if you're just making one of these I think the fastest thing would be to just use a gouge and carve it freehand. Layout the distance from the edge and width of the groove with a compass first, then just stay between your lines. Check the depth often with a small piece of scrap wood with a mark on it. When it's pretty close wrap sandpaper around a block small enough to fit in the groove and smooth and refine it.

Obviously if you haven't done any carving before I would practice on a piece of the same wood beforehand. Take small bites and watch the grain of the wood. Switch directions if you're going against the grain to prevent tear-out. Also maybe watch some basic carving videos online.

5
  • I thought of that too, but I'm a terrible carver. If you do have experience (or find that you can pick it up easily enough), this is a good way to go. Commented Mar 25, 2019 at 16:14
  • Also, it strikes me that this is probably how the original piece was done. Commented Mar 25, 2019 at 16:16
  • @CharlieKilian Yeah, I was actually thinking about mentioning that in my answer. Given the slight irregularity I'm pretty sure this was done by hand to begin with. Commented Mar 25, 2019 at 16:30
  • Yeah, if I had any talent at carving that might be the answer. I don't even own a gouge, so I'd have to do a lot of practicing. :-) Commented Mar 25, 2019 at 23:44
  • @SteveInCO, yeah and in addition you'd need to get really good at sharpening it right now since the gouges don't work at all well unless sharp as a razor. There's an Answer that can help with that but cutting the groove entirely by hand I don't think is viable for someone with zero experience (although I am upvoting the Answer since it is a perfectly acceptable option for how to do this).
    – Graphus
    Commented Mar 26, 2019 at 6:52

Your Answer

By clicking “Post Your Answer”, you agree to our terms of service and acknowledge you have read our privacy policy.

Not the answer you're looking for? Browse other questions tagged or ask your own question.