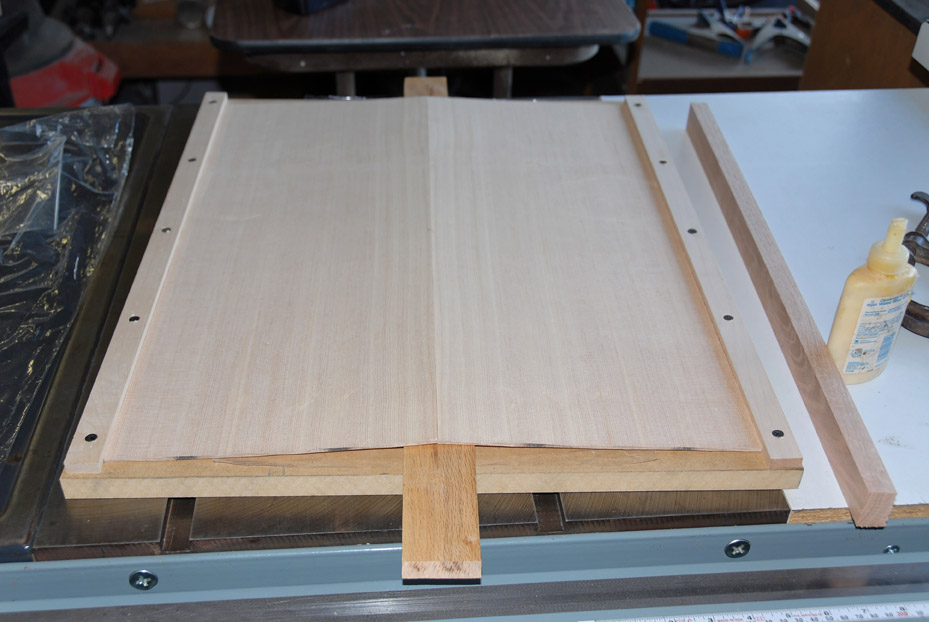
Here's the basic setup:

Source: Guitar 101 blog.
The boards being joined are a tightish fit even with that thin slat underneath the central joint, slide that out and press the two boards down flat and they are squeezed together very tightly. The two boards are held flat and prevented from tenting back up by placing a heavy weight on top or by using clamp pressure.
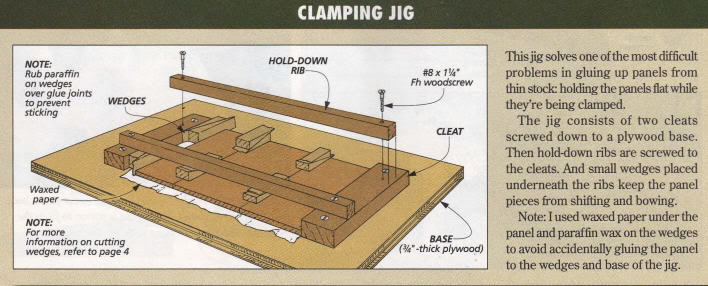
The jig is built around a flat board (usually MDF or ply these days) with at least one batten firmly screwed/glued into position as a permanent stop, the second batten that ensures the very tight fit of the panel being made must be removable* so is usually screwed in place, but C-clamps can be used to hold it as they are so strong. But make sure you crank them down hard enough that there's no chance of the batten shifting position.
Some alternative methods:

Use wedges to edge glue thin boards on Fine Woodworking.
Laminating Thin Stock – Clamps From Scraps That work from Paul Sellers.
This one recommends using lap joints, Edge Glue Thin Panels Using Lap Joints on Woodworker's Journal.
Before you glue
To ensure good results you need to ensure your edges are straight and square (or complementary angles, e.g. 88° is fine on one edge if it meets 92° on the mating edge) and for thinner boards probably the best way to achieve that is to 'shoot' the edges, by planing them on a shooting board.
If you don't own a hand plane you can joint boards using a router (hand-held or mounted in a table) and get results just as good but ensure you don't scorch the edges.
Note: for a thin joint like this it's vital to work the edges and glue the panel together as soon as possible after. Under 15 minutes is good. Waiting even a few hours can weaken the glue joint noticeably, and if the time gap stretches to overnight or longer you can't expect a strong enough glue joint to form on thin boards.
*With any jig like this the weight or clamping in the centre should not be removed first. One of the battens needs to be removed to relieve pressure on the new panel so it can be removed safely.

