4

I have some ~36" 4x4 pieces that need to have round corners with a radius equal to the width of the board. (Each end of the 4x4 will have a 1/4 circle connecting the top and bottom of the board.) The curve would lie in the plane of one of the long sides - that is, if you if you looked end-on at the "ends" (3.5" x 3.5" profile), it remains square, but looking at the front or back (36" x 3.5"), you'd see half of a capsule shape (with curves cut in each end).

Todo: insert picture here. :/

My problem is that the board is too deep to cut with my router unless I cut from both sides - it's tricky to get both sides to line up, even using the template I've cut from 1/8" MDF. I have the same issue with my jig saw as it appears to cut about 2-2.5", and the (planed) board is still about 3-1/4" thick.

I can approximate the curve with my miter saw, making a series of cuts in ~10 degree increments that are tangent to the curve, then hit it with the orbital sander to smooth it out. That works okay, and provides the the most repeatable results, but I feel like there should be a better way.

I do not have access to a band saw.

Suggestions?

Update

I tried the router approach but wasn't able to get the result I was looking for. I finally went back to the miter saw, going in 2-5 degree increments. It worked pretty well, just have to find my belt sander now. :)
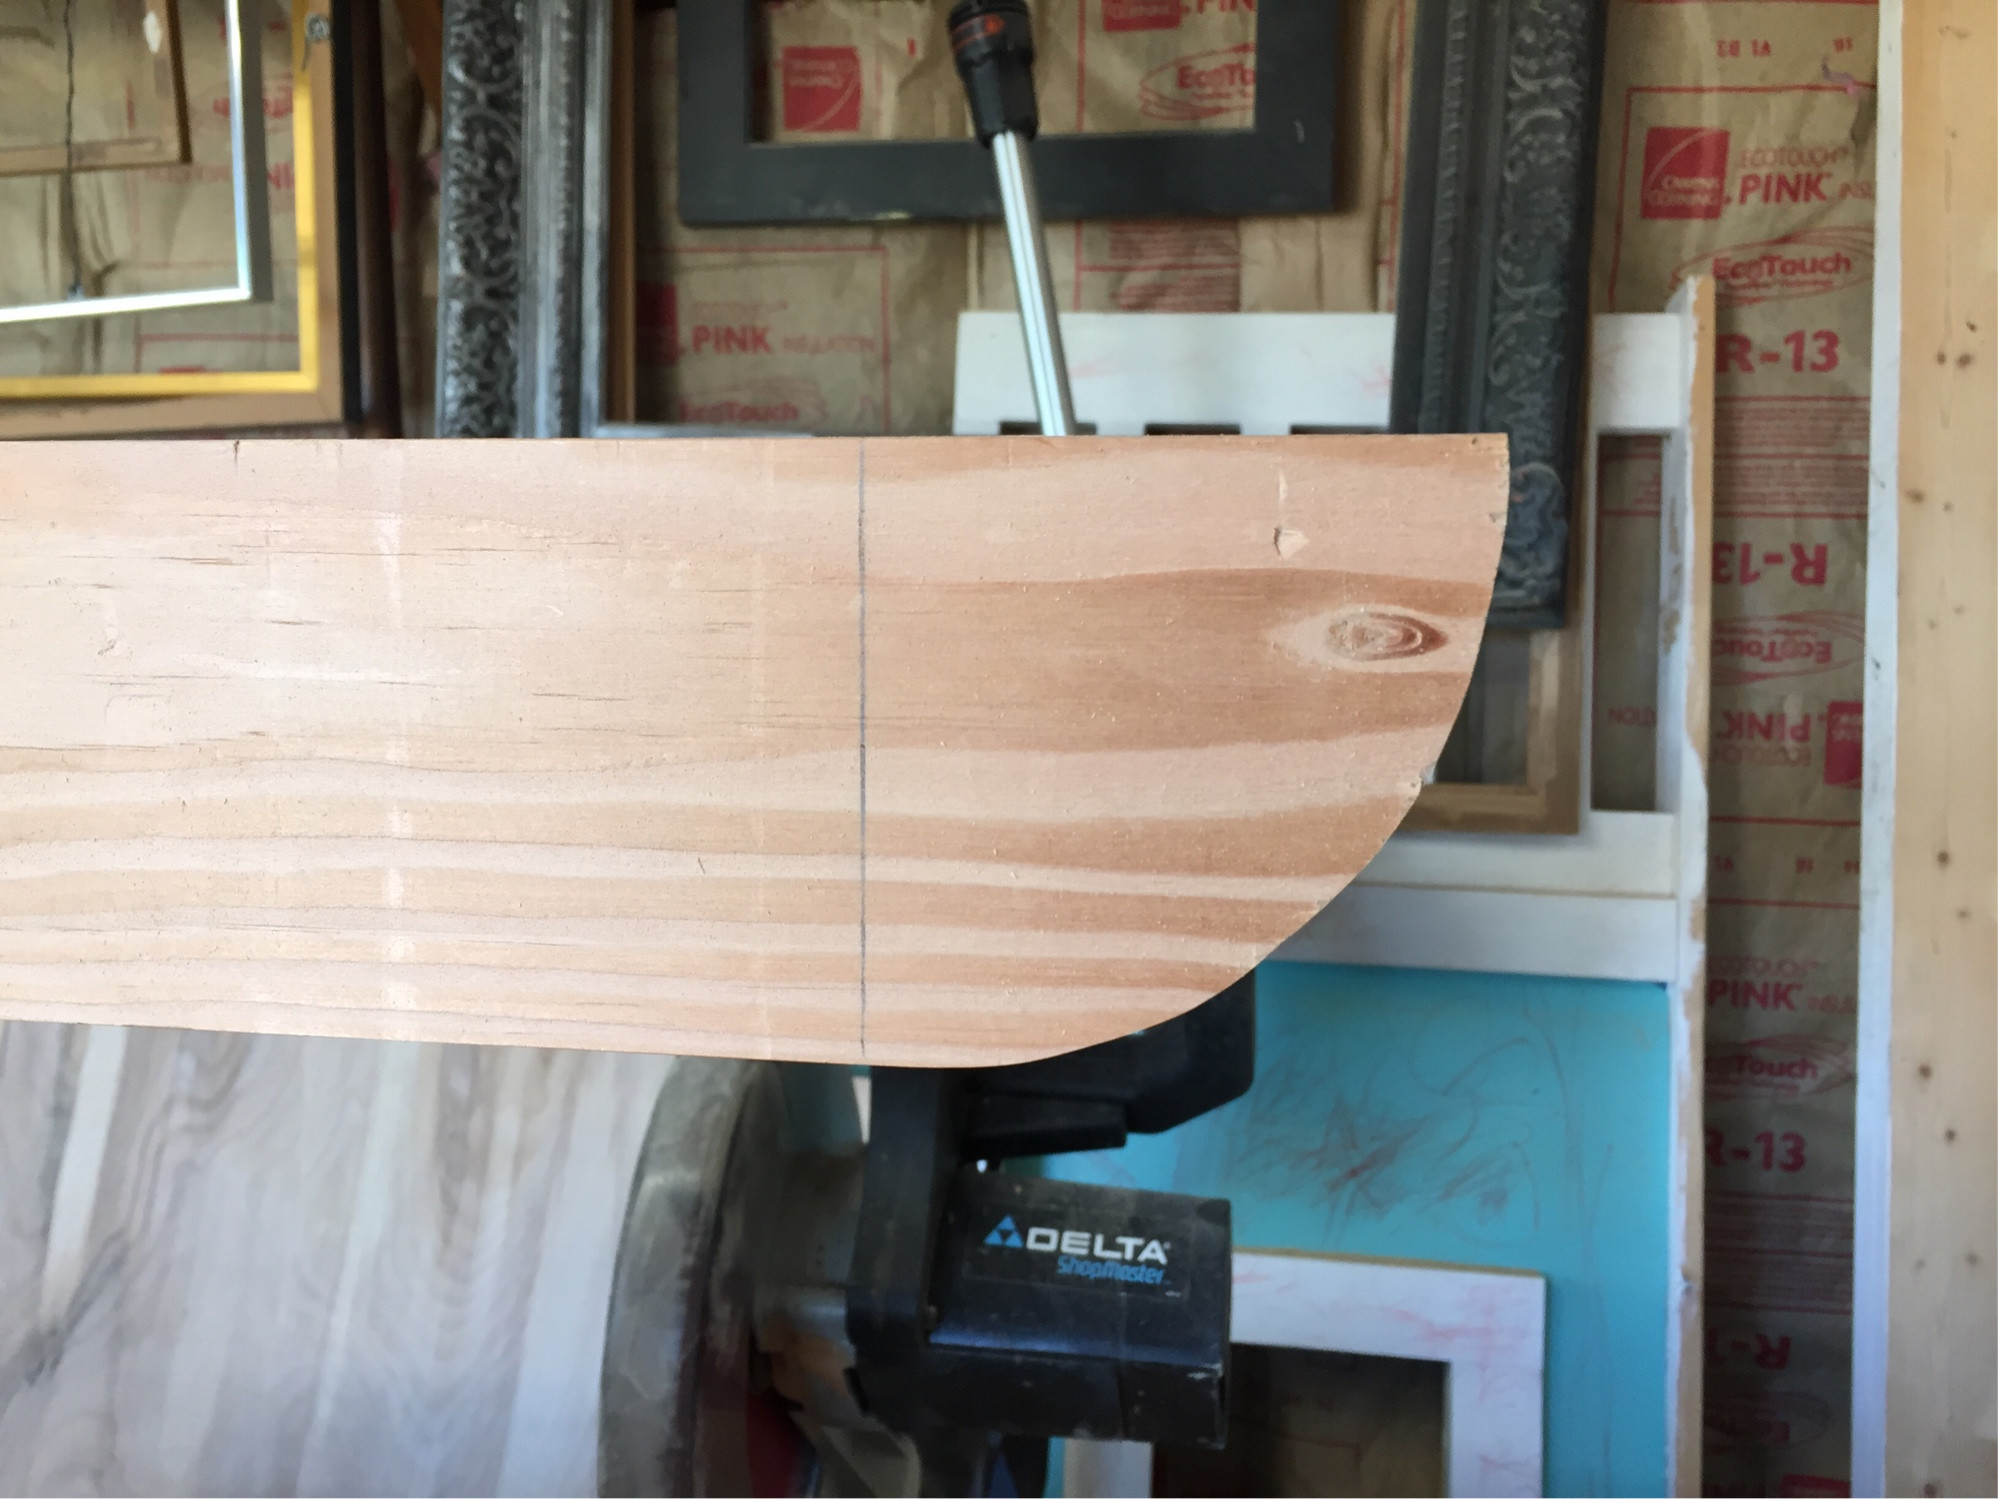
curve

5
  • 1
    I assume that you do not have a table saw which might be easier to cut with than the miter saw. Considering that there are only a few of these pieces to make, your idea of a miter saw and sanding is as good an approach as any other that might require equipment that you don't have.
    – Ashlar
    Commented Dec 29, 2016 at 15:49
  • @Ashlar my (30 year old) table saw's motor started binding up yesterday, need to pull it apart and see what the issue is. Of course that happened in the middle of squaring off the corners of the 4x4's. :/ Thanks for the help!
    – 3Dave
    Commented Dec 29, 2016 at 15:55
  • 2
    I have always found Harsh Language to be an excellent technique for restoring old shop equipment. Give it a try! :)
    – Ashlar
    Commented Dec 29, 2016 at 23:04
  • Even if you did have a bandsaw, you would end up using your sander to smooth the surface of the cut. So, as Ashlar said, you are quite likely at the optimum solution already.
    – Ast Pace
    Commented Dec 30, 2016 at 16:37
  • @Ashlar oh, I tried Harsh Language, Blunt Force Trauma and bribes.
    – 3Dave
    Commented Dec 30, 2016 at 17:03

2 Answers 2

4

...I feel like there should be a better way.

This has hand processes written all over it to me but actually I think you've arrived at what might be the best method using the tools you have available. Some things just are a lot of work and there's no getting around it, but you will get better at doing it the more of them you do. It won't get any less boring though!

Many people with access to a stationary belt or disk sander would do this sort of thing using that. Obviously it would be better to first saw away each corner at 45° to reduce the amount of sanding required, but it could be done purely using the sander fitted with a coarse belt and many people who rely on sanding a lot wouldn't hesitate to do it that way.

2
  • It just occurred to me that I could clamp my orbital sander to the bench and use it as a poor-man's (me) stationary disc sander. Shredded the edges of a couple of sanding discs, but it works.
    – 3Dave
    Commented Jan 16, 2017 at 23:25
  • 1
    @DavidLively I missed the update you posted with the pic included. If that's how close to the finished curve you've gotten with the saw you're doing very well, so well in fact I think you could reasonably hand-sand to finish off if you start with 60 or 80 and work up. Using right-angle sanding blocks as mentioned in this recent Answer will ensure the edge stays square to the face. I think you could get away with just three, for 60, 80 and 100 or 120. Any final sanding to 150 or 180 grit you could do with a regular sanding block.
    – Graphus
    Commented Jan 17, 2017 at 7:12
4

I would suggest using a router from both sides, then cleaning up the middle by hand (sawing out the bulk then planing down the rest with a block plane to be even with the routed sides). It sounds like your router template needs some work though - it has to be solidly and physically registered in two dimensions, not just aligned by eye. And before you make any cuts at all, make sure to accurately layout and mark the curves with a fine pencil... that way you'll know immediately if your cuts are true when you do go to make them.

1
  • Thanks for this. For a similar task, I wound up making an arm of sorts for the router. I removed the base plate and screwed on a piece of 1/8" plywood, put a small nail through the plywood abut 3.5" away, and trimmed the plywood into a trapezoid. The rest is probably obvious - tapped the nail into the work piece, keep steady pressure on the router and cut a near-perfect curve. I'm not sure if it was faster than the miter saw method, but it was a lot more fun. :)
    – 3Dave
    Commented Jan 16, 2017 at 23:28

Your Answer

By clicking “Post Your Answer”, you agree to our terms of service and acknowledge you have read our privacy policy.

Not the answer you're looking for? Browse other questions tagged or ask your own question.