6

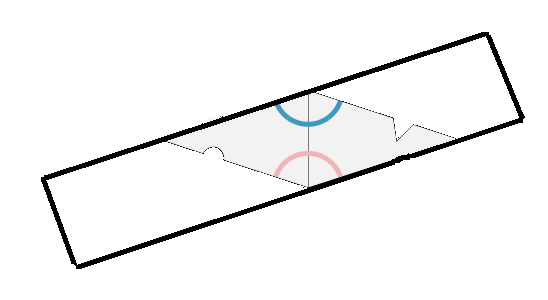
I am interested in making a bunch of Penrose tiles.

penrose

Please note that the triangles and half circle on the figures shouldn't be there, they are for alignment purposes only.

One of the tiles is a rhombus with corners of 36, 144, 36 and 144 degrees. I am looking for the community's ideas on how to make a piece of wood with this cross section. Lets say the sides are 1.5". I have a table saw, jointer, planar, router and access to most of the other tools. Accuracy is important. Any ideas and suggestion are appreciated.

Edit #1. I really appreciate all the responses. This seams like a great stack exchange.

The process I was envisioning was the following. Get a 6' piece of stock with the correct cross section, then use a band saw to cut off the individual tiles to correct thickness. Aside from the difficulty in getting the correct cross section, are there other issues / problems with this approach?

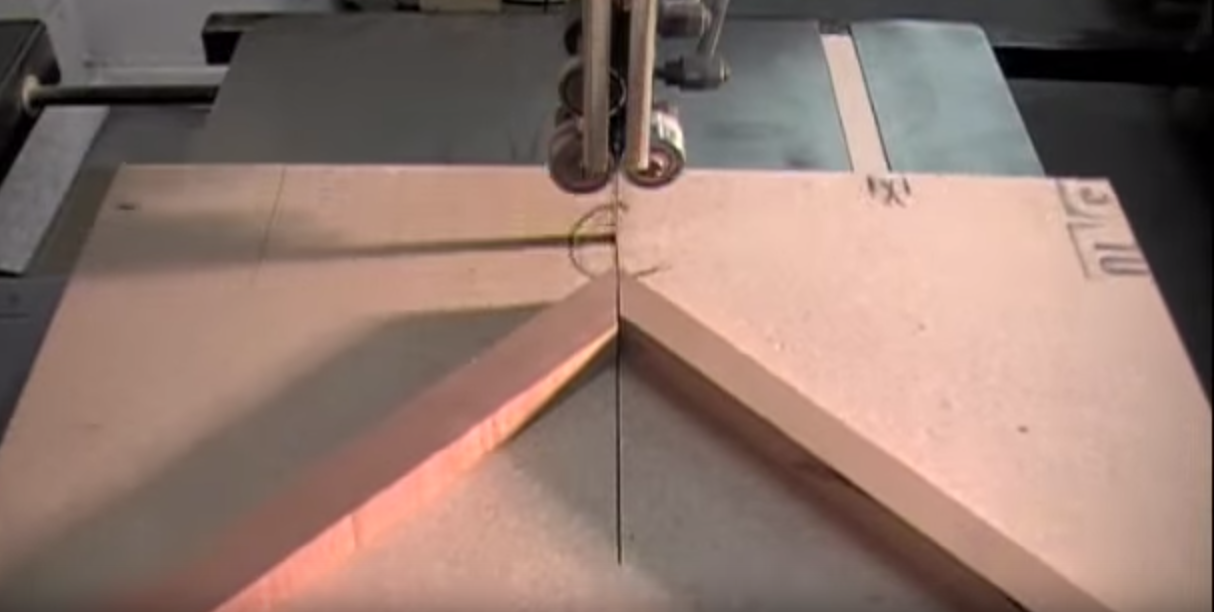
Edit #2 I found this approach on YouTube to cute acute angles. Does this seems safe and accurate?

9
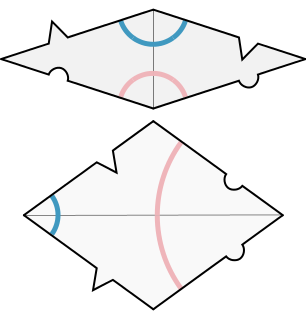
  • I included a picture from the wiki you linked too. If that is not a good picture then please change it.
    – Matt
    Commented Oct 3, 2015 at 18:00
  • note that the picture caption is Matching rule for Penrose rhombs using circular arcs or edge modifications. I am not including that in the post since I still am not sure what the OP is looking for exactly.
    – Matt
    Commented Oct 4, 2015 at 13:30
  • Your edit suggestion would work fine. You could use my answer to make the large block and flip it on its side and run it along a fence on the bandsaw/
    – Matt
    Commented Oct 5, 2015 at 0:08
  • The slice-off method would be my first approach, too. You will be in for a bit of sanding to get the band-saw cross-cut surfaces smooth and of a uniform thickness. The big challenge is in cutting a cross-section of an isometric triangle. I'm assuming that you will be gluing to of these together to get the rhombus shape. But then you already said that you know that part will be a challenge.
    – Ast Pace
    Commented Oct 5, 2015 at 4:36
  • 1
    Be careful not to change the scope of the question. In edits you have asked a new question really. In regards to your most recent edit I don't know why you would not just tilt the blade.
    – Matt
    Commented Oct 6, 2015 at 14:31

4 Answers 4

3
  • Bandsaw / (table saw... maybe. Bandsaw I see being preferred.)
  • Mitre sled
  • Clamp(s)

I figured the band saw would be a good choice since many support a miter sled or if nothing else you could make one. With all the pieces you only really need to measure two cuts. The other two would be parallel to the previous so a simple fence would suffice there. For the first 2 cuts the miter sled could be adjusted to very precise angles assuming the sled itself is true to begin with.

Depending on how many pieces you are making and how often you plan to do this making 2 mitre sleds or one with complementing angles would suit very well for making consistent precise cuts. Both the table saw and bandsaw typically come with a basic one.

45 degree mitre sled

Image still from YouTube

Above is a picture of a custom 45 degree sled. Of course that is not exactly what you want but we need to show that it is a simple design. Make one with your angles and then you could clamp on stops (blocks of wood clamped on the side of the fences for determining the length of cut) so making repeated buts will be the same without the need for repeated measurement. The author of the video above appears to be using particle board for his sled. I would recommend something better like baltic birch which seems to be the choice of sled makers.

Is you make longer strips of wood that are the width of a perpendicular line that intersects 2 opposite sides of you blocks you can then make each from two cuts. It is easier to show a picture based on the one attached.

enter image description here

Table saw would also function in the exact same way described above however a bandsaw would be safer if you are planning are cutting more than one piece at a time which would be more efficient. Bandsaw is always cutting in a downward motion. Table saw blades are moving in a circular motion so if one of the board caught the blade it could pull some out and cause kickback or worse. Not to say their is zero risk with the bandsaw. You could get blade jams and maybe snaps but those would be less likely to harm you. If you are planning on cutting one peice at a time this is not an issue. I would still use the bandsaw since it has a smaller kerf.

Clamps would also help in either case if they were attached to a mobile part of the sled and applying downward pressure. Building a custom sled would allow more room for these types of clamps.

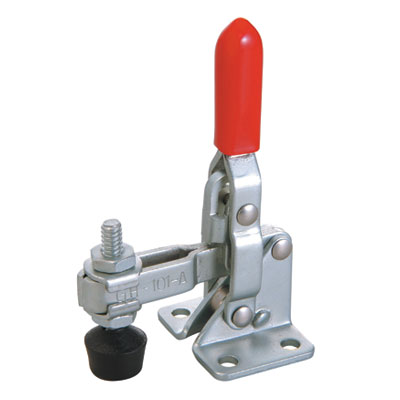
Toggle clamps

The amount of wood you could do at one time is factored by the thickness of your wood, the throat size of the bandsaw and the abilty to keep it from moving while you are moving it.

All of this if fine and dandy in theory... It might be to difficult to do this safely if your pieces are as small as you described but as long as you are careful this could still be done.

My suggestions above would help get the angles you need. Like you suggested another solution to get the same results every time would be to cut a thicker block using the suggestions above and the flip it on its side to run trough the band-saw along a fence.

5
  • If we assume the rhombus is all that's needed, rather than having the alignment tabs shown in the picture, then I agree -- bandsaw or tablesaw, with a sled or with a miter gauge adjusted to exactly the right angle and a stop to make the length of the side repeatable. If those tabs are needed, see my suggestion of scroll saw.
    – keshlam
    Commented Oct 4, 2015 at 0:41
  • @keshlam I put the picture in there. The tabs from the photo are to illustrate the alignment of the pieces I doubt are part of the actual design. I was trying to add some sort of photo to give context. That was the one in the linked page of the OP
    – Matt
    Commented Oct 4, 2015 at 0:44
  • 1
    @Matt, "The tabs from the photo are to illustrate the alignment of the pieces" dang, I thought they were a necessary part of the shape (and obviously one of the most challenging parts to shape by ANY conventional operation)! Still, cutting by laser may be the best option for absolute accuracy, but without them cutting by table saw or bandsaw is a lot more feasible.
    – Graphus
    Commented Oct 4, 2015 at 8:12
  • @Graphus I might be wrong. I only put that picture in there as it was from the wiki article. Without the photo it is hard to know what the OP wanted.
    – Matt
    Commented Oct 4, 2015 at 13:27
  • Yeah, the tabs are not part of the tiles, they are just shown for alignment purposes.
    – fred
    Commented Oct 4, 2015 at 15:29
2

Or use a scroll saw (essentially, a powered coping saw/fretsaw) to cut these out following a template glued/transferred to the wood, then touch up the edges as needed to make them fit well. Fairly manual-task intensive, but it's a cheaper tool than the laser cutter. How many do you need? (Note that cutting several sheets stacked/pinned together is quite possible and would reduce the effort involved.)

This is assuming you really do want the alignment tabs shown in the picture. If you can dispense with those, a jig and either bandsaw or tablesaw is probably the best approach; see that answer.

1

At the small size you're intending the pieces to be I think the answer to this is simple and it doesn't revolve around any conventional tools or shaping operations, not with wood's inherent friability and the potential losses from errant chip-out at edges.

Laser cutting
I'm sure that's the way to do these, not only will the accuracy be far higher than they could possibly be made by hand (not just by you, by any human) it means that no marking out whatsoever will be needed.

Laser cutting will require that a digital outline file be prepared, but once this is done the cutting is trivial (fully automatic) and at any point in the future further tiles can be made, e.g. to replace damaged or broken ones, by running the same file again.

These outline files can be of a few different file formats, generated by different programs. Ffor example a .AI file from Adobe illustrator, a .CDR file from CorelDRAW or a .DXF file from AutoCad. In addition, laser-cutting services will give further details to help you lay out the outlines on the sheet properly, e.g. providing a sufficient border around all sides of the material.

Material choice
If you hadn't given particular though to materials yet, particularly if the tiles are intended to be quite thin I think you should probably go with a high-end plywood rather than solid wood. There will be some sticker shock with quality plywood, but it will be worth it for the quality hardwood face veneer and the consistent, void-free internal plies.

If you do want to go with solid wood a close-grained hardwood should be chosen, not something open-grained (e.g. oak or ash) and certainly not most of the softwoods, which have very variable hardness from the light 'earlywood' to the darker 'latewood' bands. An ideal choice would be boxwood, which has grain so fine it can be nearly impossible to see with the naked eye. It's also very hard and dense, hence why it was the wood of choice for small, accurate rules (rulers). But boxwood could prove very hard for you to get in the amounts you need and possibly the price will be too high anyway.
1
  • Yeah. If high-end plywood is going to cause sticker-shock, boxwood is going to be lethal. Commented Feb 19, 2018 at 17:48
1

Another solution, depending on how much precision your tools will permit: start with a blank block, plane it to the height of the rhombus, cut triangle off one side, cut the other side at the same angle taking a triangle plus as much more as is necessary to correctly size the rhombus's width, then cut slices of this at 90 degrees to form your tiles. The small size is the main challenge here, and getting it precise may take some experimentation, but it permits rapid production once you're set up.

1
  • Yes, this is pretty much what I was envisioning. My table saw only goes to 45 degrees + a little. So I can't make this cross section on my table saw without some sort of jig or trickery. Any ideas on that?
    – fred
    Commented Oct 4, 2015 at 15:27

Your Answer

By clicking “Post Your Answer”, you agree to our terms of service and acknowledge you have read our privacy policy.

Not the answer you're looking for? Browse other questions tagged or ask your own question.