when I am levelling out wood with my plane, I get little pits (likely I suspect from the blade chipping against denser areas.
This is called tearout, it is not caused by denser areas of the wood (in fact it can be common in softer sections of a piece of wood).
It occurs when bundles of wood fibres literally tear free from the surface of the board instead of being cut neatly by the plane's iron (plane blades are now commonly referred to as irons).
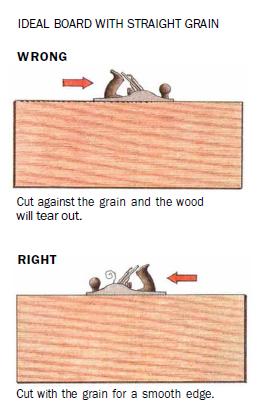
The usual recommendation of a solution to this is to plane 'uphill', where the grain rises upwards and away from the direction you are cutting, versus 'downhill', where it is rising towards the edge of the iron. However not every board is uniform in grain and it is very common to find areas of rising grain in just one portion of a board that is otherwise easily planed (this is the case both on the faces as well as the edges of boards).
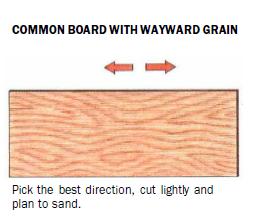
Some species are well known for having grain that can frequently change direction, and hard maple and certain types of oak are commonly noted for this characteristic.
Any suggestions or recommendations to help improve the quality of the surface while manually levelling out my working surface?
It may be impossible to avoid, but there are a few things that can minimise the problem. Most are adjustments to the plane itself, some of which are obvious and some are not.
Reading grain
Before we get to plane adjustments one thing you can do in all cases is strive to plane in the correct direction, even if this means changing the direction you plane multiple times over the surface of the wood. This is not as easy to do as it is to write, but it can be used as part of the fix for this problem and many experienced woodworkers do this when required.
Rather than attempt to exhaustively cover how to read grain here (would make for an excessively long answer) I'll just link to this detailed piece on Popular Woodworking.
Now to the plane itself.
Plane tweaks
There are three things to look at:
- the sharpness of the iron
- cap iron setting
- blade projection
It should evident that you should strive to have your plane iron as sharp as you can possibly make it. This is always preferable anyway, but here the sharper an iron is the more likely it can cut through tricky grain rather than have it rise up and break free from the wood surface.
The second adjustment is not at all obvious and that is the setting of the cap iron (commonly called a chipbreaker today). For easy planing on wood with simple grain this can be set back from the cutting edge, possibly 1.5mm (1/16"). But it can be set much closer than this, and should be where a finer surface is desired as well as when experiencing tearout. For this it can be set "as close as you dare" as one woodworking guru puts it. Which in practice can be a fraction of a millimetre, e.g. 0.2mm (0.008") or less.
Lastly, projection. If you adjust your plane to take the thinnest shaving possible tearout is minimised anyway, combined with the above two tweaks you can eliminate it entirely.
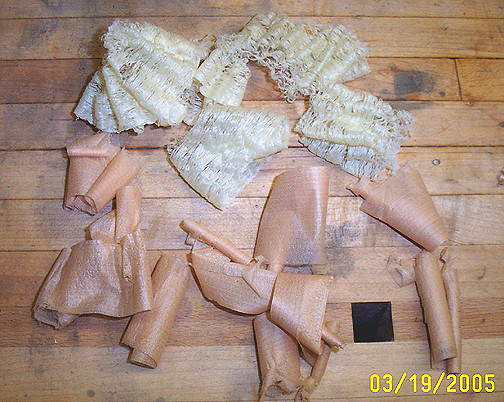
Measuring the thickness of plane shavings accurately is fraught with difficulties and not everyone has a digital calliper anyway, so visually the shavings should be whispy, sometimes described as "lacy", and at thinnest should barely hold together if handled. More like the ones at top than the ones at bottom in this image:

If you find that you cannot bring everything together so that you get no tearout at all, it should at least be minimised. To tackle the last of it I would recommend that you switch from sanding to scraping as much as possible for final smoothing.
Scraping
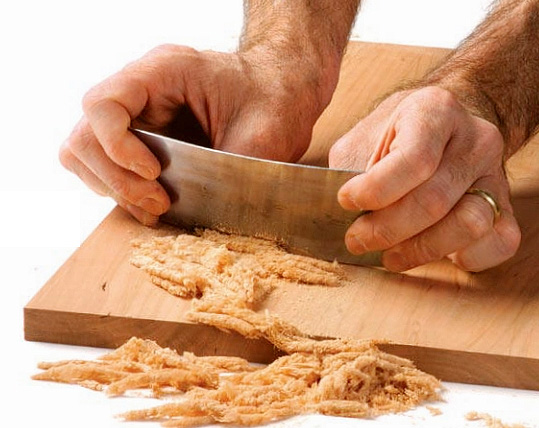
Card scrapers are inexpensive and produce a surface that is actually superior to sanding with less effort, and often faster (even when compared to power sanding).

[Source: Mastering The Card Scraper]
Best of all, a single scraper will last you your entire life so they are effectively the equivalent of an infinite amount of sandpaper.


