2

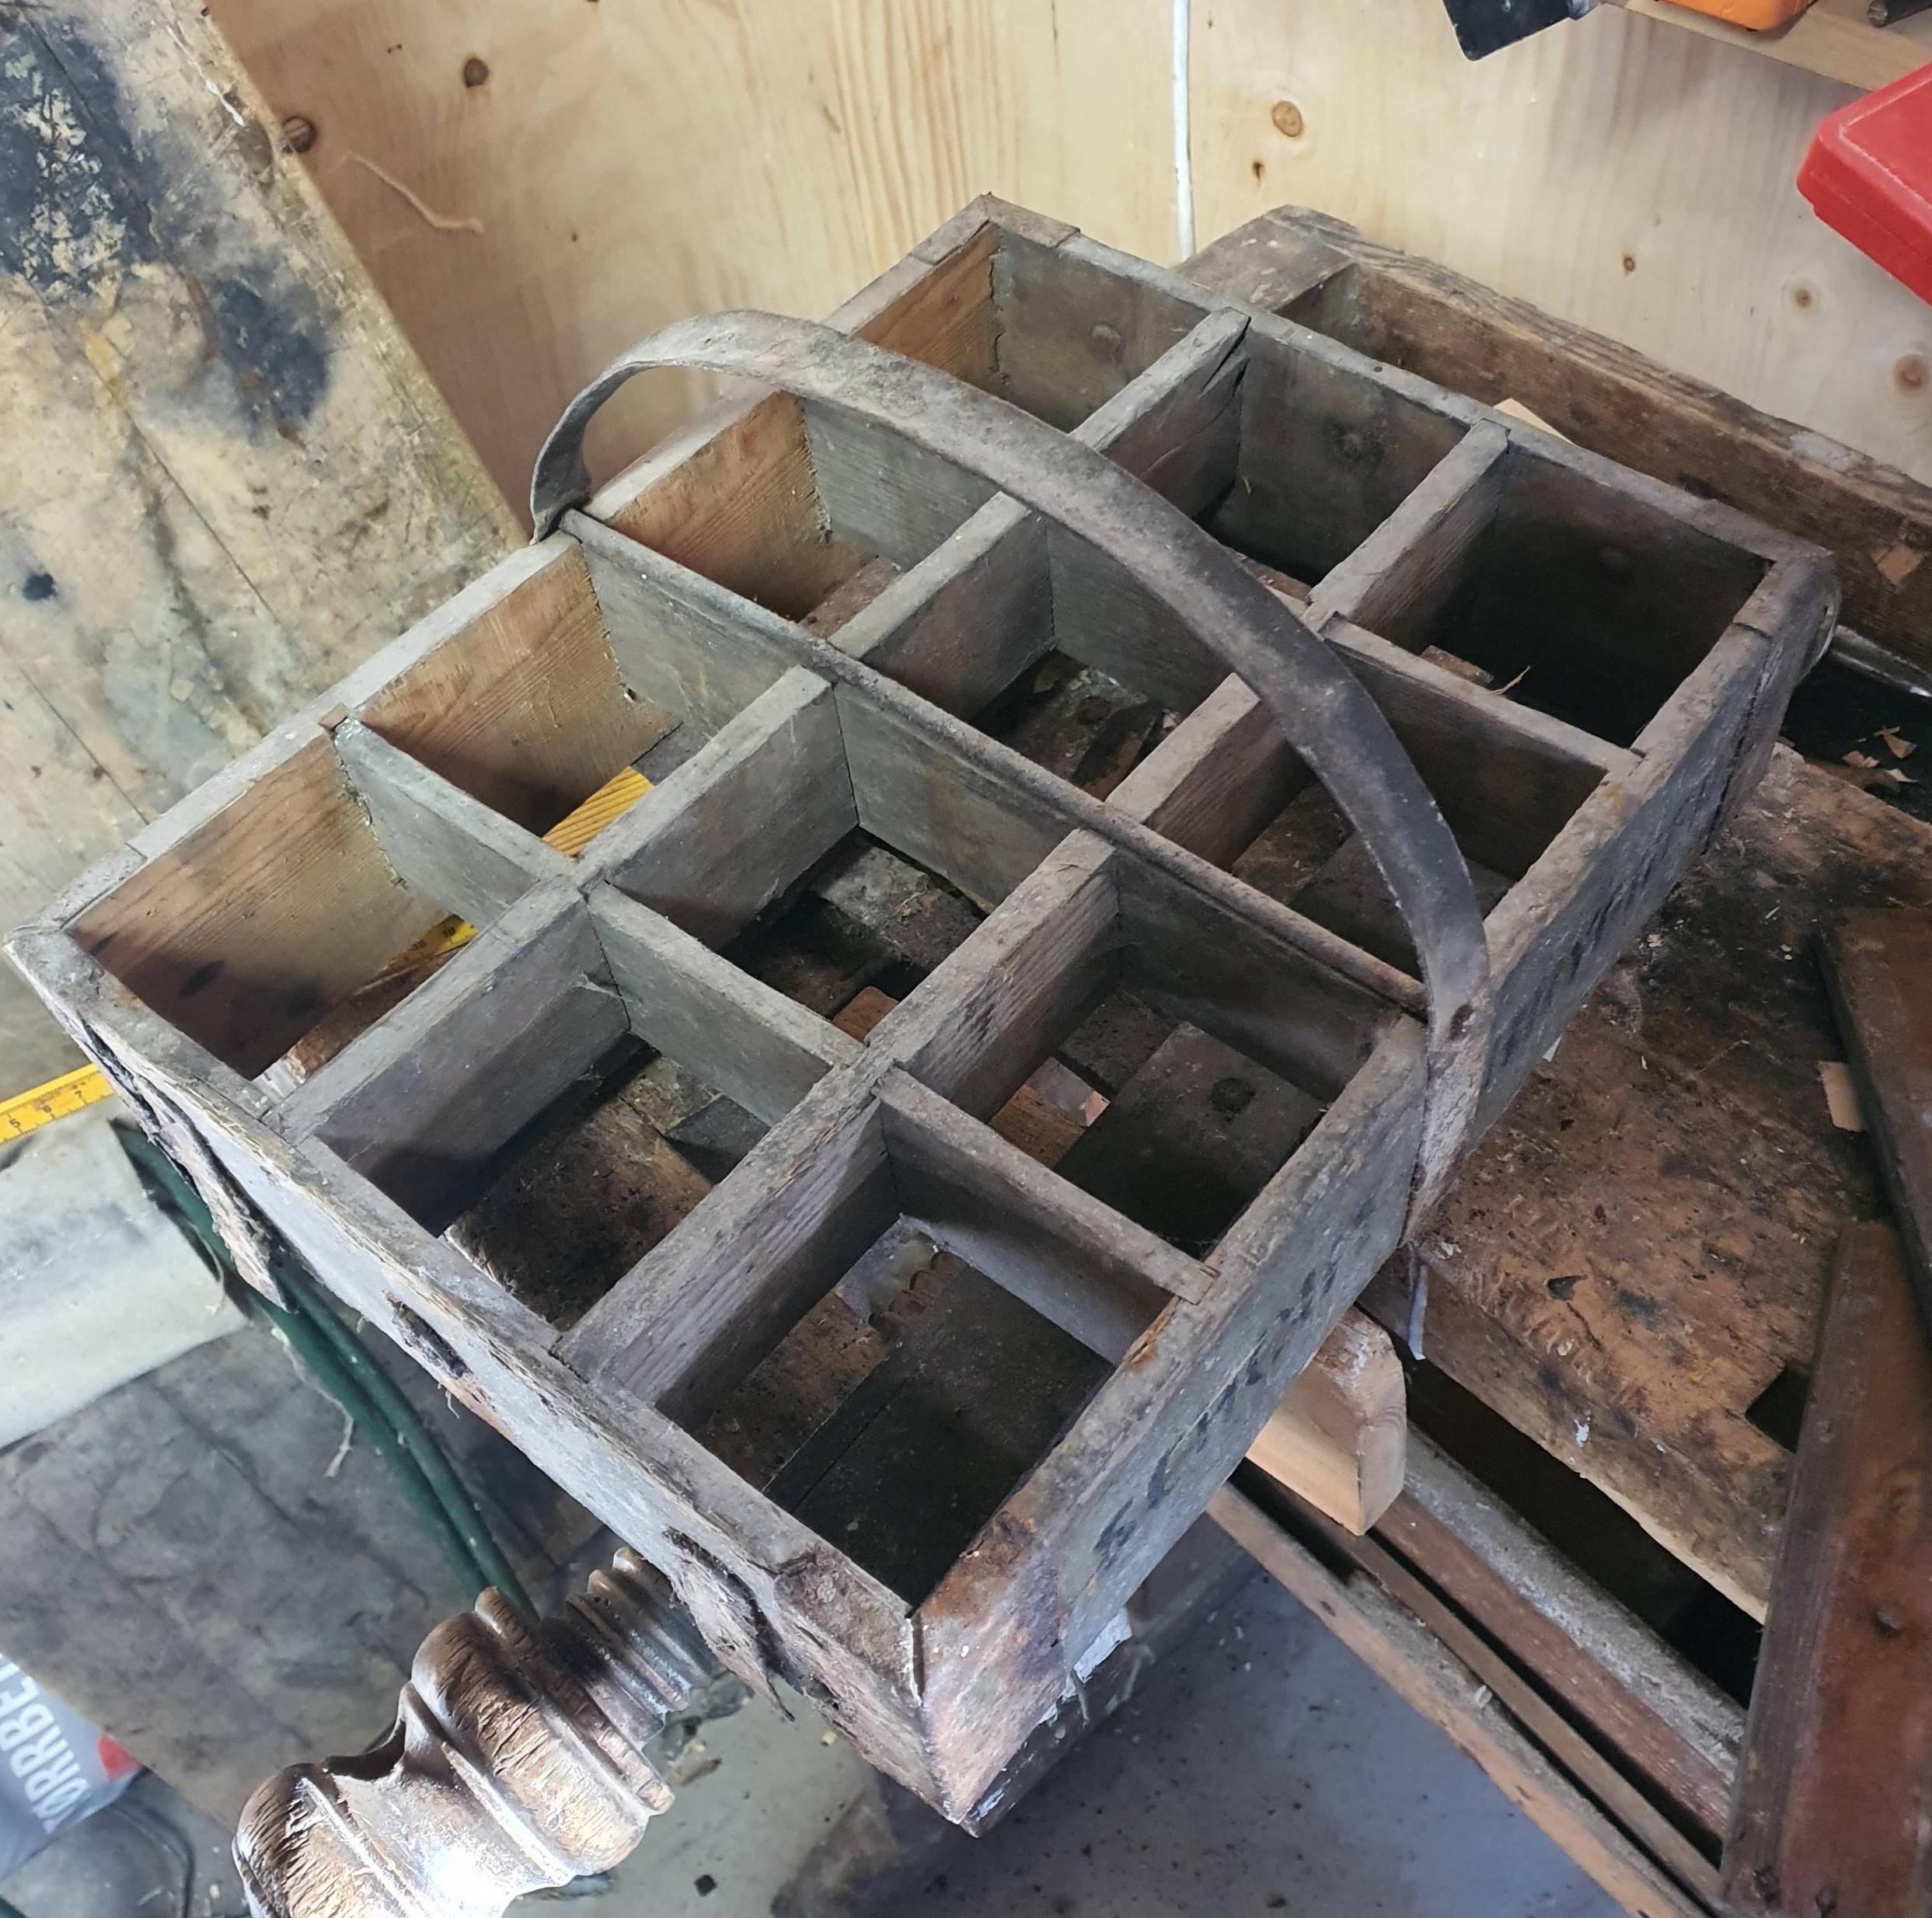
I am making a bottle carrying basket similar to the one in the photo but with a wooden handle and also a higher arc for the handle.

enter image description here

The handle is to be an arc with an inner diameter of approx 30 cm (11-12") with a thickness of approx 1 cm (3/8") and a width of approx 4 cm (1 1/2") My idea for making the handle would be to steam it and bend it into shape on a premade jig. I was thinking about making it from two pieces, each approx 0.5 cm thick (3/16"), shape the first one and then glue on the second.

I have never before been steaming wood and when thinking about this, I realized that the pieces will be pretty wet, so I will have to let them dry before glueing. So my plan at the moment is to fasten the first one to the jig, then prepare the outer one, fasten it on the first, let it cool down, then take it apart and let them dry for a while before I glue them together.

Does this sound like a reasonable plan? Does anybody have an estimate of how long I would have to let them dry before I should glue? The basket in general is made of maple, I can use maple for the handle as well, but I also do have some cherry, ash, spruce and even some juniper available for the handle. I know I could maybe make it in one single piece as well, but at the moment it feels like a better solution to make it out of two thinner pieces.

As @Graphus commented, the ergonomics may not be good, my plan has been to make straight dummy to try to feel which dimensions makes sense.

I do not yet have a steam box, but I think that may be useful for some other projects as well, as a home brewer, I have quite a few of the necessary parts...

I have also been thinking about making a laminated handle from some strips so thin they can be bent without steaming, but with the machinery I have available, it is difficult to make things thinner than approx 5mm.

3
  • Do you have a steam box made already? If you don't there are two alternatives that won't involve having to make one and arrange a suitable steam source. First is basically the same plan but instead of steaming you simply boil the pieces in water. Second is not to use heat bending at all, and simply laminate up the handle from thin enough pieces of wood that they're flexible at room temperature. Either way you'll easily be able to achieve the required diameter.
    – Graphus
    Commented Jun 26, 2022 at 17:10
  • Are you sure of the dimensions of the handle in terms of the ergonomics? This seems a bit wide to be a comfortable hold in an unyielding material like wood... I'm thinking of how uncomfortable some wide leather baggage straps were that I've had to grip and they were very close to 40mm in width.
    – Graphus
    Commented Jun 26, 2022 at 17:16
  • 2
    Re. making thinner strips, what machinery do you have available? If you have a planer but it won't allow the planing of material 1/8" or thinner you can temporarily attach wood to a sled of some sort (e.g. a piece of MDF) to raise the surface enough so the planer can take it down to the desired thickness. And there's always hand planing. Planing wood narrower than the plane iron is among the easiest of planing tasks, although if you're using hard maple/sugar maple it'll be a workout because of the hardness. Ash would be easier, and ash is also generally considered a very good bending wood.
    – Graphus
    Commented Jun 27, 2022 at 15:13

2 Answers 2

4

Your plan is reasonable. I have made many components for baskets by steam bending relatively thin slats, then glue laminating them together to get thicker, curved and very stiff pieces. I would offer some suggestions for how to get to success (and will answer your question about drying along the way).

First, selection of your wood is important. You want strips with no grain runout at all if possible, so you want to cut the strips from quarter or rift sawn lumber, or from the straight grained edge of a wider flat sawn piece. I would go with three 1/8" strips, rather than two 3/16" for your work. Air dried is better than kiln dried, but as you probably can't get any, with strips as thin a 1/8", kiln-dried will be fine. 1/8" strips will be easier to work with, and having two glued surfaces in the laminate will actually make a structurally sounder and stiffer final handle. If you want a 1 1/2" handle, as you suggest, make 2" strips. But structurally, a 3/4" or 1" handle would be just as good.

Make yourself a form over which to bend the strips. In your case, that will be a 2" wide form that fits within the inside curve of the handle. You'll want to make sure you build the form so that you can clamp the strips to the form all along the length of the handle (and yes, you'll need quite a few clamps - for cuves like this, a clamp every 3" is not excessive).

With 1/8" strips, the steaming can be done in a number of ways. You can steam the strips in a steam chest (or a plastic bag) with steam from an electric steam generator, or a self made generator (saucepan with lid, hose, and some silicon tape), and when the wood is pliable, clamp it to the form. Or you can just clamp a strip to the center of the form, direct steam at the thin strip and slowly bend it around the form, steaming and clamping as you go until you reach one end, then do the other side the same way. I've used this technique many times for one-off laminates with tight radii. You do want good gloves and to take real care around the live steam, though. Live steam will cook your fingers very quickly.

Once you've got a strip steamed, bent around the form, and clamped, leave it for at minimum several hours. When you remove it, it'll spring back some, but that's not a problem. Tie the ends together with a long strip of tape or something, and let it dry.

You can bend all three strips on the same form in separate operations, or bend and clamp them all at once. Either way works.

I would let the strips dry for a day before gluing. More won't hurt, but won't really help either.

For the glue up, you want to coat both sides of the glue line with glue (I use waterproof PVA glue like Titebond 3 for these, but anything that gives a reasonably hard glue joint and has good open time will work; Epoxy has the advantage of a long open time, but can be very slippery and messy to work with, whereas a thin, but complete coat of PVA glue tacks the strips together making clamping easier. But, if you prefer it, epoxy is structurally a good choice). Make yourself a fourth strip and cover one side of it with plastic packing tape, to use as a caul and clamp pad.

For assembly, put the glued strips on the form with the clamp pad on top, and start clamping at the center (top of handle), working both ways to the ends. As I say, you'll want clamps every 2 or 3" along the form, with short block cauls where there are reasonably flat stretches on the handle profile. Your biggest challenge is getting the glue joint tight (thin glue line) as you go around the curves. If you've got a strap clamp, one solution to this challenge is to use it to clamp the strips around the entire form (so you have a layer cake of form, 3 strips of glued wood, the taped caul, then the strap clamp). Then use regular clamps right over the top of strap clamp to thoroughly seat the joint.

As an alternative to the above, you could also cut yourself even thinner strips, and skip the steaming - just glue laminate them. You might get by with that with 1/8" strips too, but the radii you're after are probably at the margins of what you can get in a 1/8" strip with no prebend.
5
  • Some really good tips here, including some not often seen. +2 if I could. One comment confused me though, about epoxy being hard to work with? Within limits I don't think there's a major difference working with any of the (five?) main fluid glues in common usage today. And re. epoxy versus PVA specifically in certain scenarios (including thin-strip lamination) epoxy can be noticeably easier to work with for a number of reasons, e.g. no grab, longer open time, no need to clamp as hard to ensure a strong bond forms.
    – Graphus
    Commented Jun 27, 2022 at 15:35
  • "You can bend all three strips on the same form in separate operations" Wouldn't that give you 3 strips of the same radius bend meaning the outer two strips would be too tight?
    – FreeMan
    Commented Jun 27, 2022 at 16:23
  • @Graphus: At least for me, when doing built up laminations, the fact that epoxy is slippery, and PVA glue tacky (very tacky, if you are spreading it as thinly as you should be for laminations), makes the latter much easier to work with. YMMV. I'll add a note in the body. Commented Jun 27, 2022 at 20:15
  • 1
    @FreeMan: Bending wood on a form this way doesn't give you a very precise radius (it's very hard to predict the relaxation you'll get from one piece of wood to another). And it doesn't really matter for this, because the thin strips come out of the bend still quit flexible - the point of the steam bending is to get the strips into roughly the right shape. There isn't any difficult getting the pieces to conform tightly to one another when you glue and clamp them. Commented Jun 27, 2022 at 20:25
  • Yeah I can see how one might prefer the tack for this; as you say mileage varies. Unrelated BTW: to me this is a classic example of the surprisingly low voting that we get some of the time, given the evident value this Answer has. Back in the early years here this is sure to have have raced to >10.
    – Graphus
    Commented Jun 28, 2022 at 18:36
2

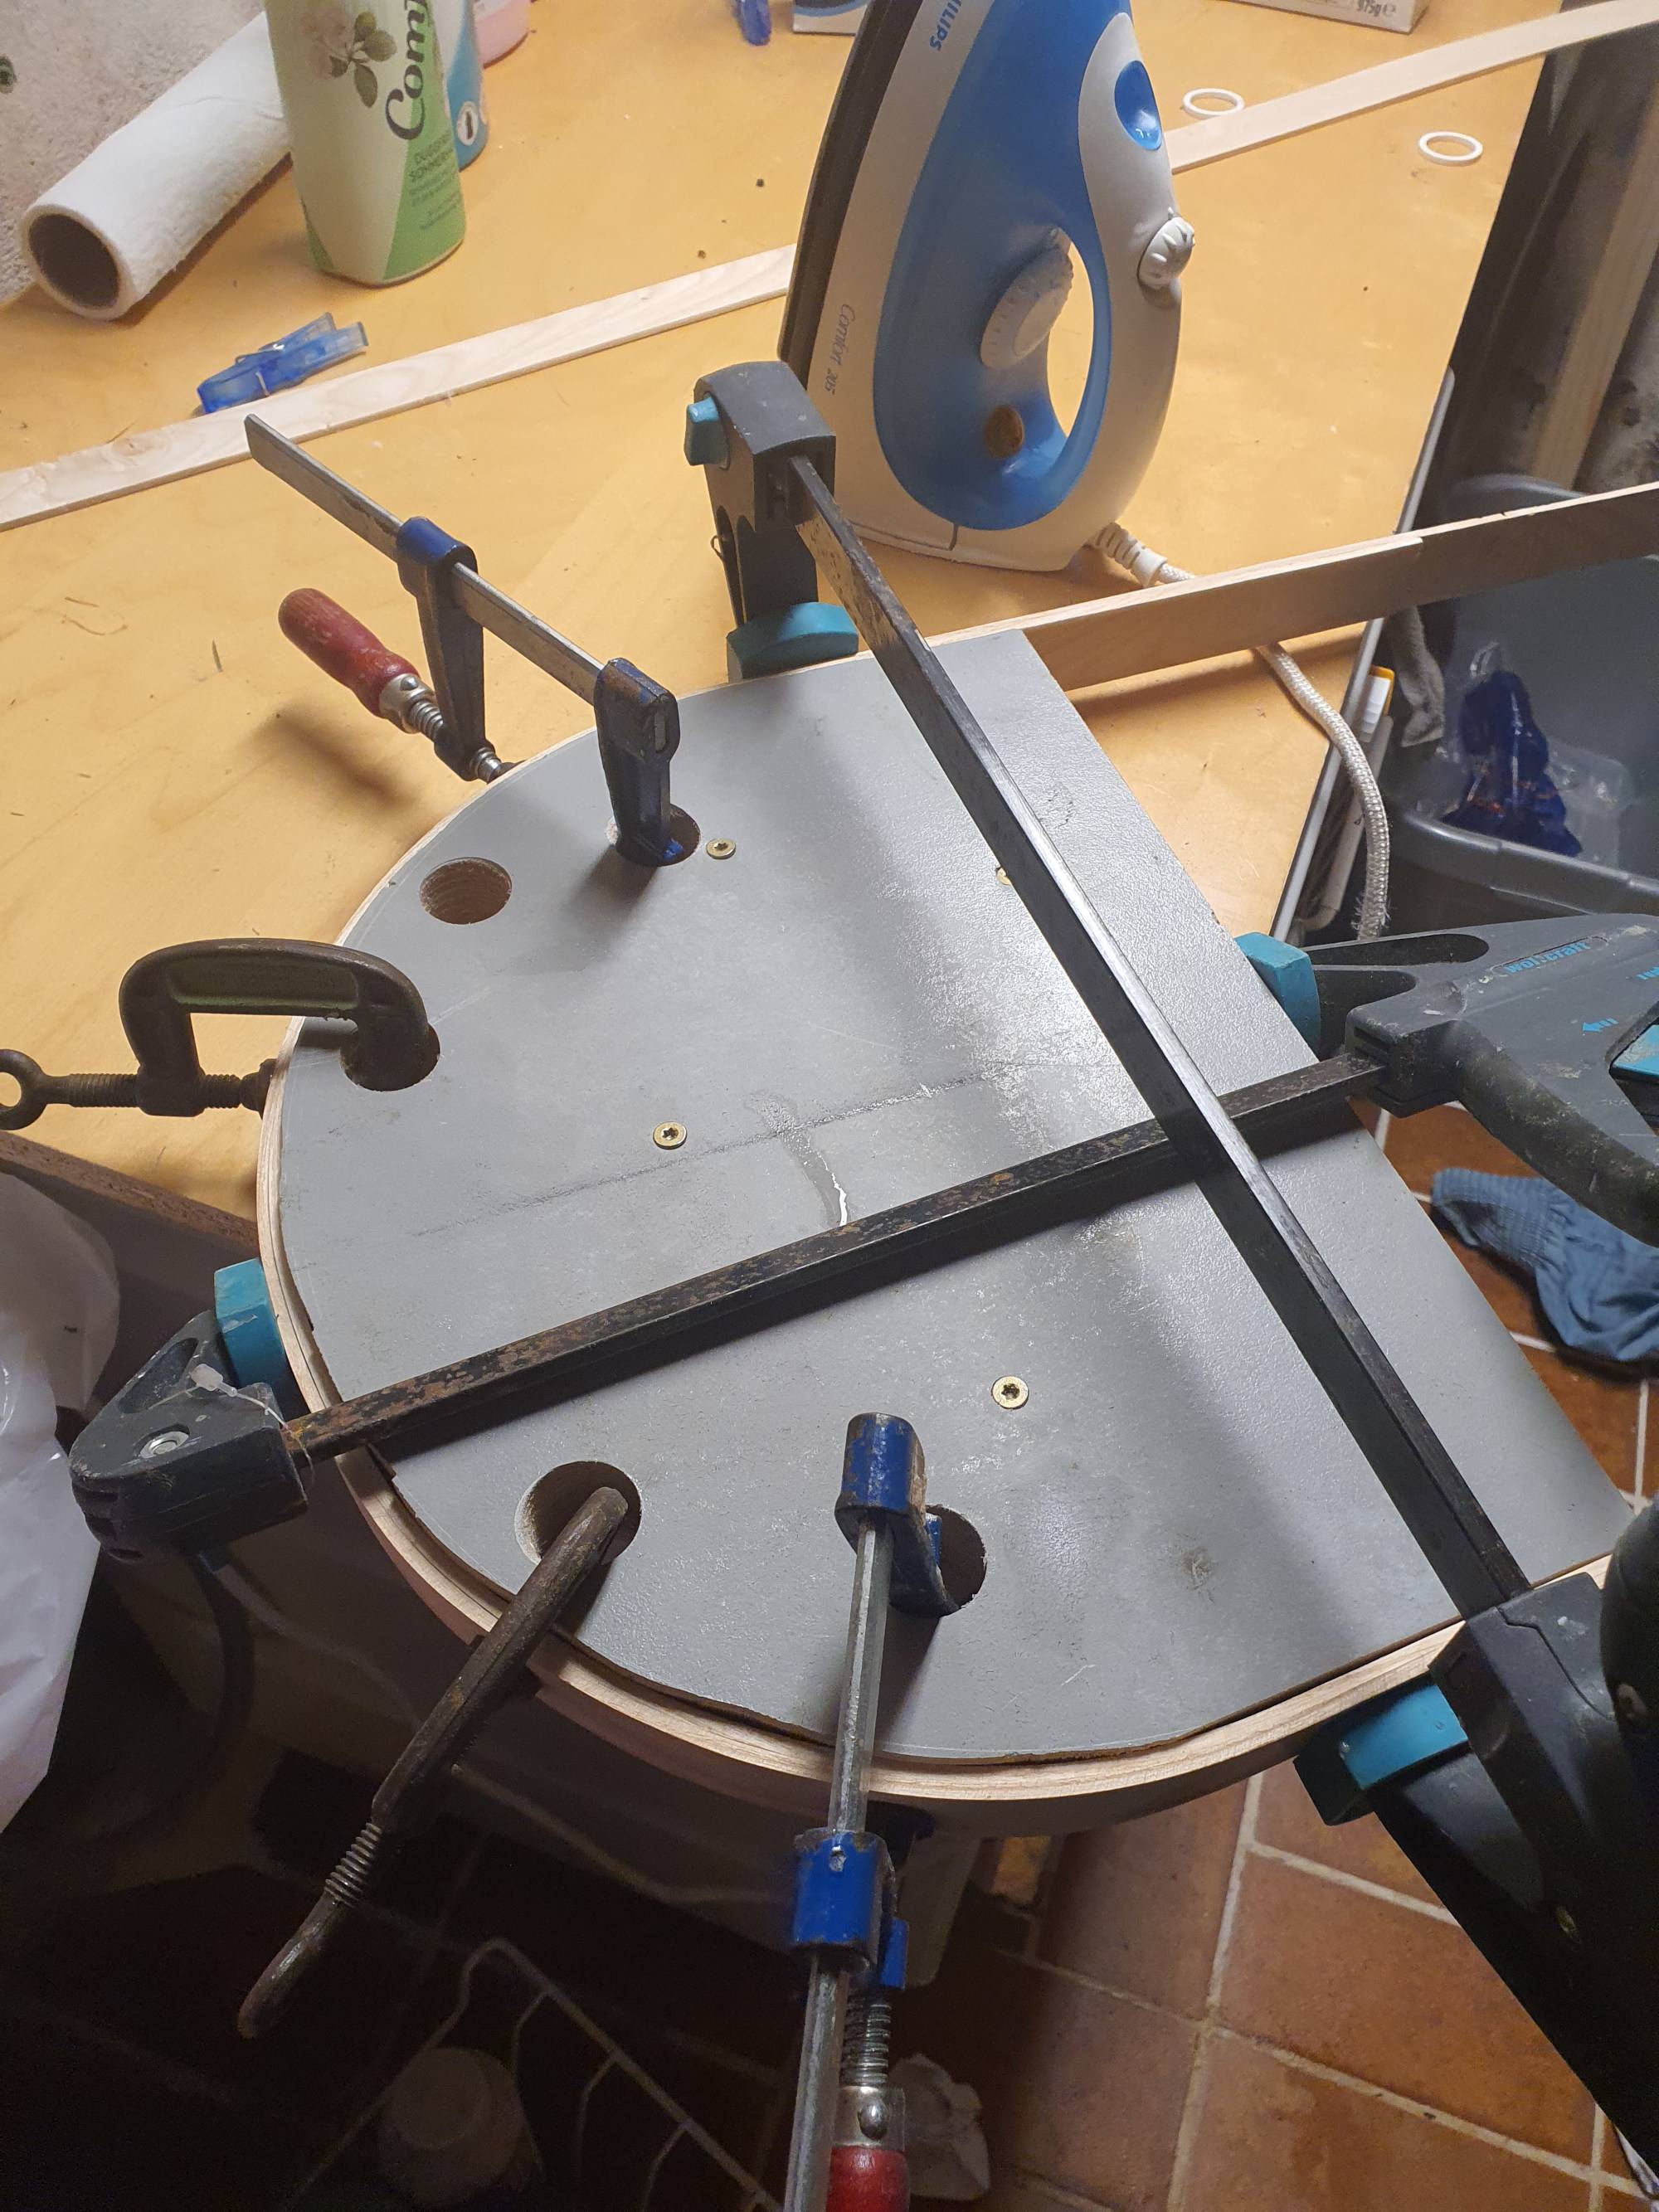
Following the ideas from @Walnut Close and others, I made a sled for my jointer, made three slices of ash, each arond 3-4 mm (1/8") and set up a jig using some water safe plywood I had sitting in my store.

In the end I used a steam iron to do the steaming. That worked just beautiful, using a little bit of force feeling very easy when I had used enough heat and steam so it went into the shape I wanted. Ready for glueing up tomorrow.enter image description here

About 10-15 cm (4-6") between each clamp. This seems to have worked fine, and after all, I do not have more small clamps. (Every woodworker needs more clamps!) The jig was a bit rough, but my thought was that if it is not too far from the intended shape and no parts are protruding, it should work - and it seems to have worked well.

1
  • Great to see follow-through on the suggestions provided, thanks! Nicely implemented, hope the rest of the project works out well for you.
    – Graphus
    Commented Jul 1, 2022 at 22:01

Your Answer

By clicking “Post Your Answer”, you agree to our terms of service and acknowledge you have read our privacy policy.

Not the answer you're looking for? Browse other questions tagged or ask your own question.