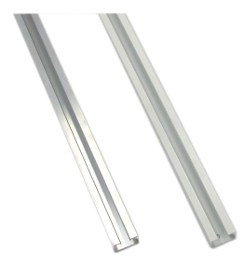
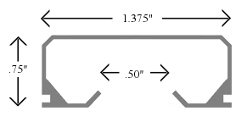
As noted in the comments, you're looking to build a "tambour" door, and I think it might look rather nice!
If your desire is to use wider panels, I think you're going to be a bit on your own heading out into uncharted waters, as usually they're built with narrow slats in order to successfully make the complex turns in both directions usually associated with tambour doors. However, I've got a couple of thoughts that may help you out.
Usually tambour doors are narrow slats, radiused on top and bottom, then usually glued to a strip of canvas or similar material near each end. The radius allows the slats to slip past each other a bit as they go around curves, and the canvas holds the whole assembly together so moving one moves them all.
To make your wide slat door, you're probably going to want to continue with the radiused edges. Your other option would be to rabbet the edges so they overlap just like your regular overhead garage door. These rabbets work well to help weather seal a garage door and help provide strength along the edge for the 8-16 foot span of a normal garage door, but my opinion is that the rounded edges will look better on a furniture quality piece of work, however, that's up to you.
If you go with a standard tambour construction, you're going to have to have very wide slots where the slats make their curves so that there's room for them to make the corner without jamming. If you have enough clearance in the top of the cabinet (behind a valance/trim strip), I think you could probably get away with this, as the top strip would be fully vertical when the door was completely closed, and wouldn't start its backward/curving motion until (just) after you start opening it. If, however, you don't have enough clearance at the top, then the top strip will be curved backwards, leaving a gap. While you're not trying to weather proof your TV nook (you're not, are you? :D ), it will look odd since the panel won't be fully closed.
To resolve this, I would think that you could install a single metal pin (potentially with a plastic wheel) into the edge of each door slat. The other end of the pin (or wheel) would ride in a groove machined into the side of the cabinet. Placing the pin in the vertical center of the slat would allow the slats to pivot around a single point and should significantly tighten the turning radius they could make, thus allowing you to get away with much less overhead clearance. The slats would, of course, have to be attached to each other with some sort of hinge, and I'd suggest that the canvas strips at each edge (possibly with one or two spread across the width, as well) would be more than sufficient for the job. In this installation, the slats would fit between the side panels of the cabinet with only the pin sticking into the groove milled in the cabinet wall - if it weren't for the top of the cabinet or the face frame (and the fact that they're attached to each other), each slat would be able to spin freely on its center pin.
At this point, you're going to have to make one or more prototypes to test out possible turning radii for your track, and to make adjustments as necessary on the edges of the slats to ensure they're going to clear each other as they go around the turn. Additionally, you may find that you need a bit of slack in the webbing connecting the slats to allow them to move slightly independently as they navigate the corner. You may also have to play with different widths of slats to find a compromise between the look you're going for and the functionality you desire.
It's possible that the single, centered pin may end up not working at all. If that's the case, I'd adjust the prototype to use two pins, one pin near each vertical end of each slat. If you go this route, you should be able to navigate a much sharper turn, as the pivot point will be closer to the end of the slat, thus requiring less clearance from the top (and potentially back) of the cabinet. As a slat makes the corner, the wood will straight-line the curve of the groove as the pins follow the groove precisely, but that's OK while it's in motion or even stopped part-way up to show off your handy work. Again, some prototyping work will be in order to figure out the radii of the track grooves, offset of the pins from the edges of the slats, and radii required at the top/bottom edges of each slat.


 Not sure that curve is tight enough - will take a look this weekend. Another thing I'm considering is having the door slide sideways instead of up and down.