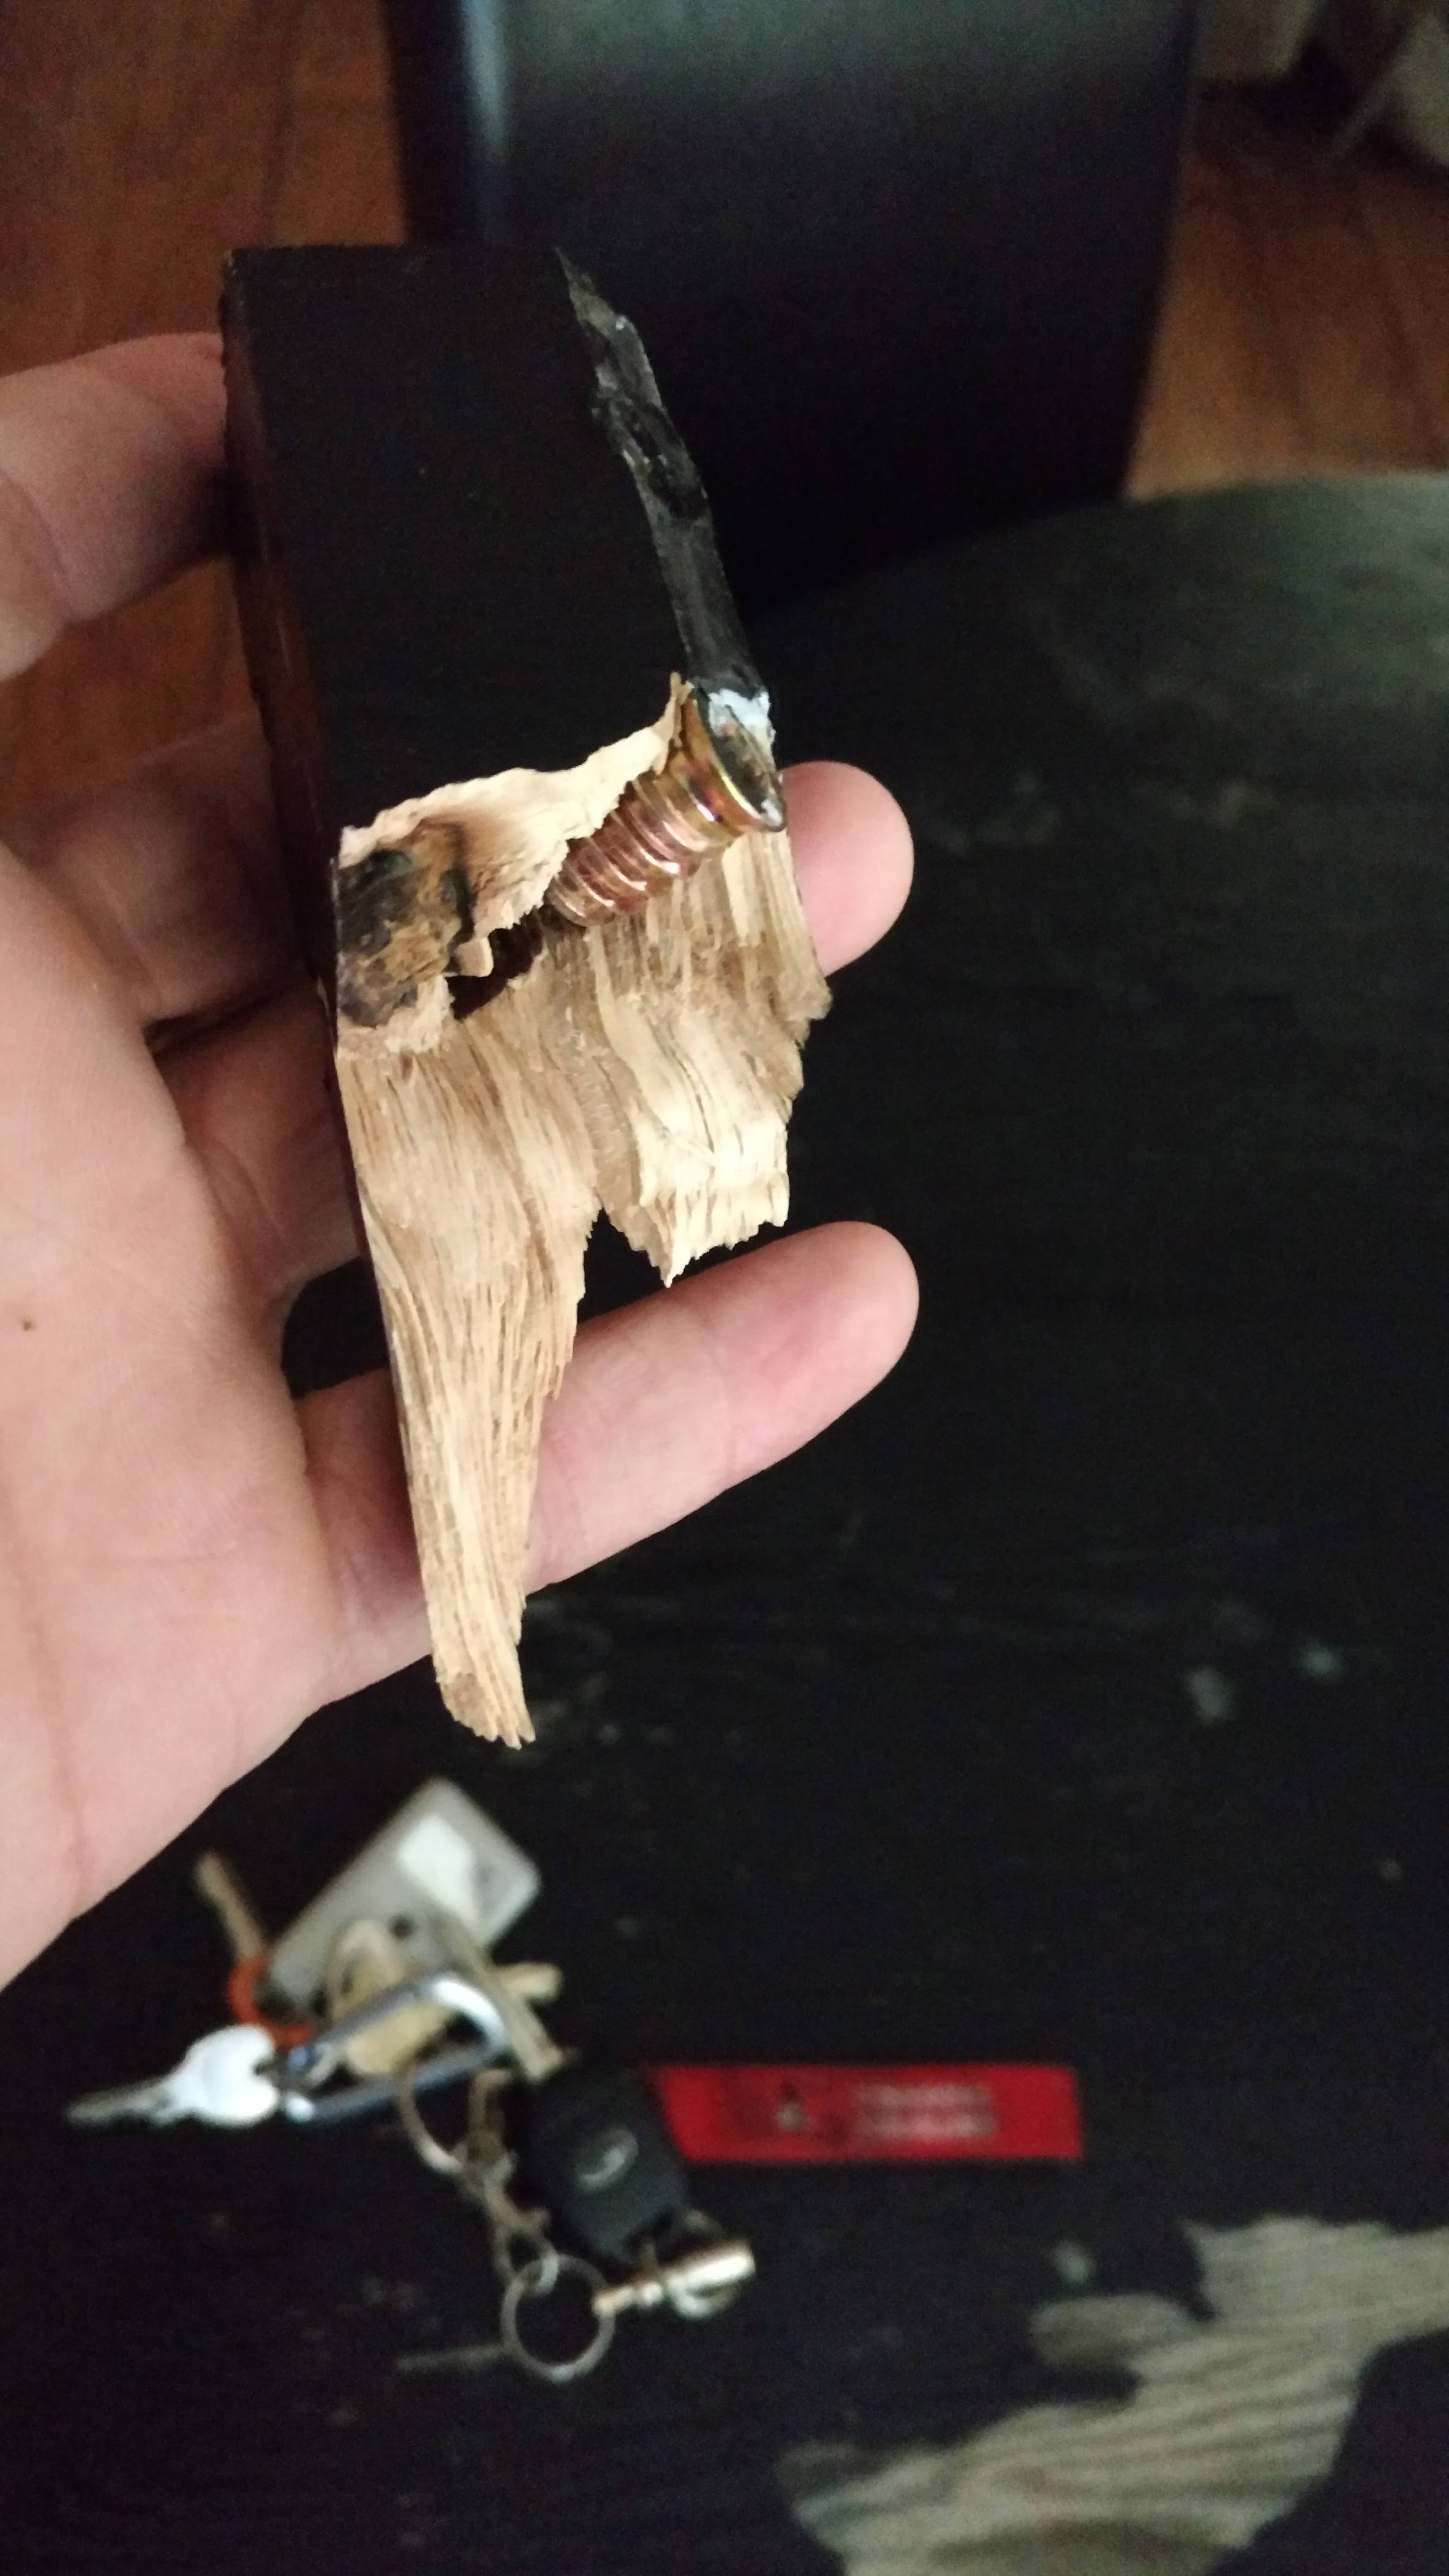
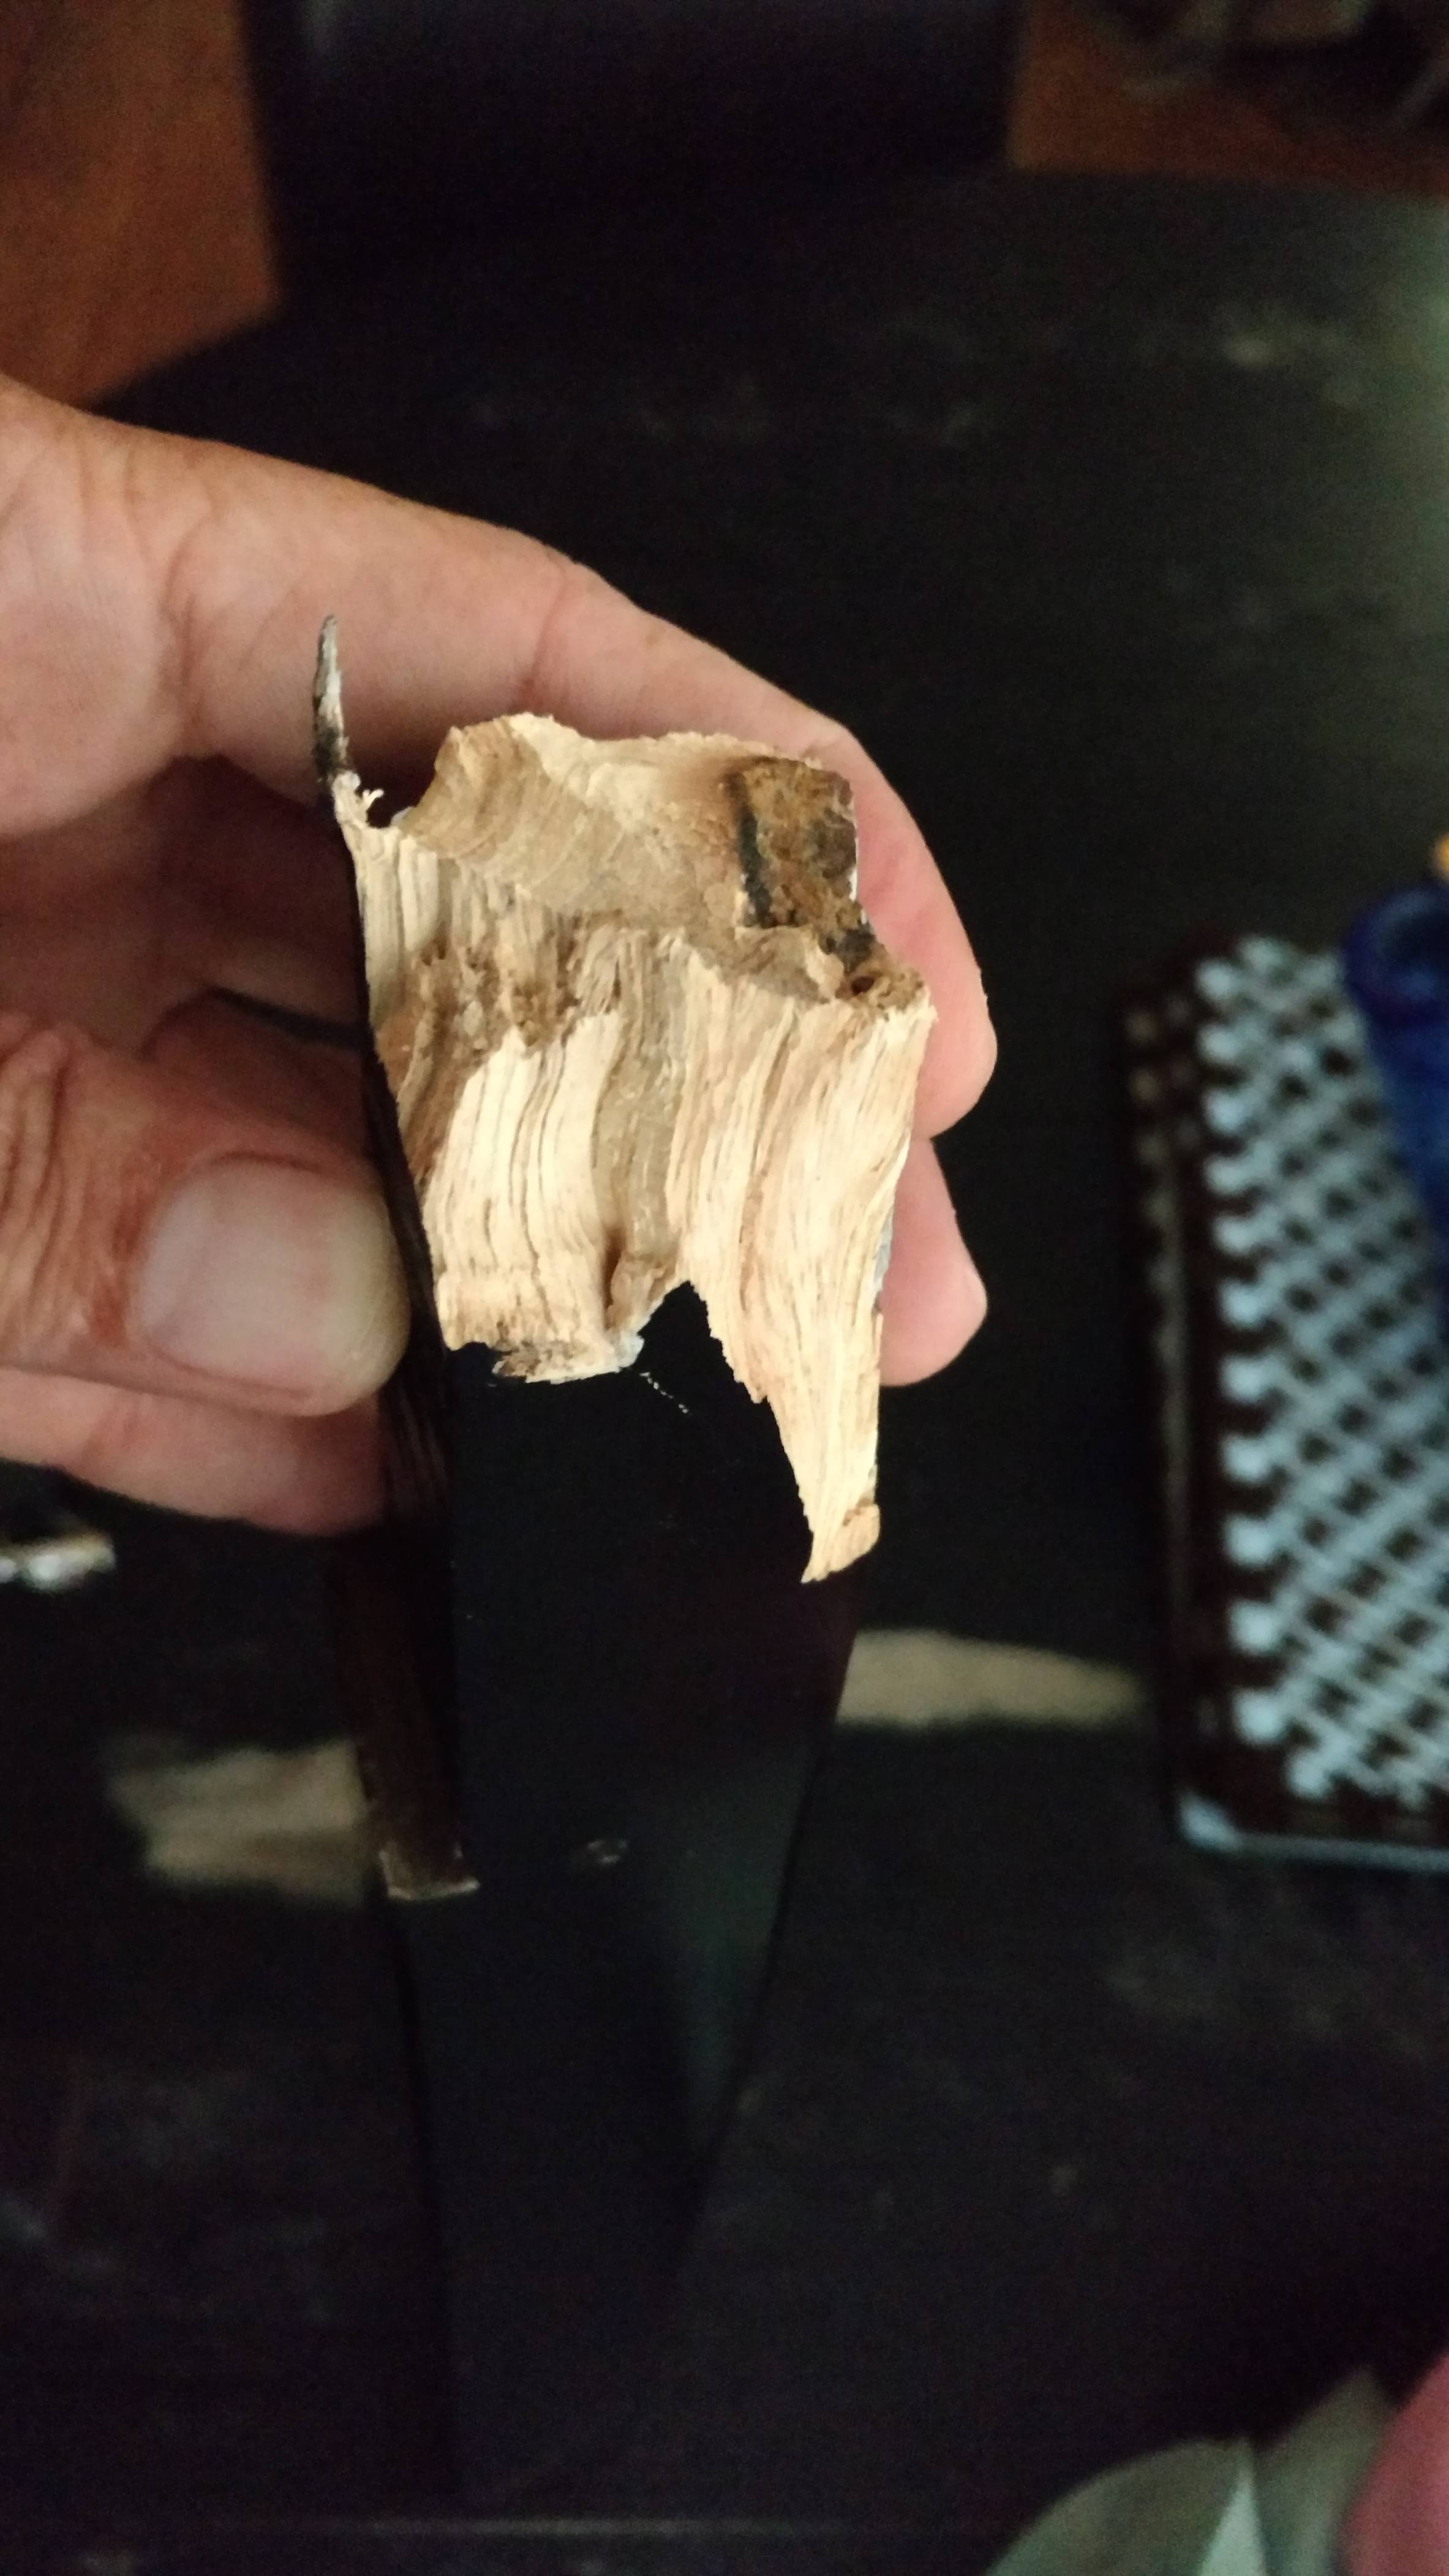
This can be salvaged easily. Use epoxy - it will create a bond stronger than the wood. In this case, you are to use glue to overcome the structural weakness of the wood itself and epoxy excels at that.
You will need two part 5 minute epoxy (I suggest transparent instead of colored epoxy), clamps, scrap wood to protect the chair leg from the clamps. From the pictures given, it looks a like a clean break with a good surface and it is clampable - with a long clamp making contact at the chair leg top (the part that normally points to the ceiling) and the chair leg bottom (the part that normally is touching the ground).
Remove the hardware. Test fit the two parts, removing any bent bits or broken bits - you want the parts to fit together fully. Also test how your clamping will work, so you can adjust before you are 'on the clock' with mixed epoxy.
Mix the 5 minute epoxy in equal parts (as per the directions). Then apply, attempting to cover the interior surfaces while avoiding the opening for the hardware and avoiding the exterior edges. Then clamp the pieces together firmly. The firmness of the clamping is important to the strength of the joint and keeps the leg in the correct shape. If your test fitting, didn't work, a second clamp across the short side of the leg will help.
If the epoxy drips into the channel for the hardware: You can unclamp the leg, open the joint, wipe the channel clean, and reclamp. When lazy, I have used a small carving gouge to remove the extra epoxy when it starts to harden, instead of unclamping.
Since the outside of the leg has a smooth finish, if some of the epoxy bleeds out during clamping, my advice is to leave it. A small blob of epoxy is easier to remove than a smear of epoxy. On unfinished wood, the epoxy leaves the wood looking 'wet' with a glossy surface. Be advised: the epoxy can remove some or all of a finish under the blob when popped off.
While the epoxy claims five minutes to set, there is some variation depending on mixing, age of the product, etc. Also the full bonding of the epoxy takes a much longer time to set fully, so just leave it clamped up for a while longer - a few hours or so. Reassemble the chair normally. The repair will be visible as a hairline fracture.

