2

I’ve got a Veritas tapered tenon cutter and feel like I am missing something obvious for using it efficiently.

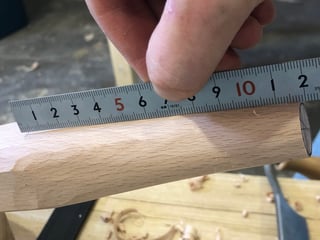
Suppose I have a square chair leg 4 cm (1 1/2 in) thick, and I want to create a tapered tenon on it. The cutter is about 3 cm (1 1/8 in) at the wide end and about 1.6 cm (5/8 in) on the narrow end. Obviously, I need to remove some material first to start using the cutter. I have 2 very closely related questions:

  1. Which shape should I impart on the leg before applying the cutter? Reduce to a cylinder that barely fits the wide end? Reduce to a cone with approximately the same included angle as the cutter? A cone with a smaller angle?

  2. What is an efficient way to achieve the above shape? I have chisels, block & jack planes, a flat bottom spokeshave, a travisher, rasps, hand saws. I don’t have a lathe, or a drawknife, or a bandsaw (any of those seem like they would save a lot of effort). I could consider getting a drawknife.


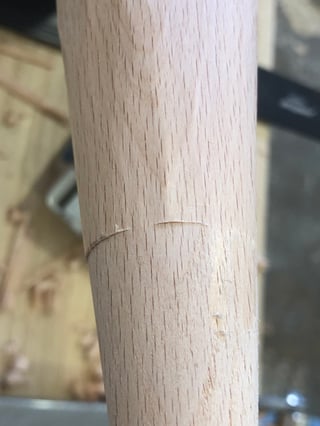
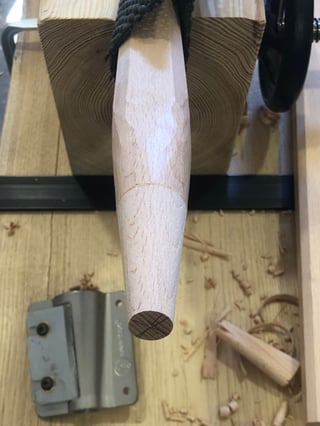
What I’ve tried so far was to reduce to a cone with approximately the right angle. A wide chisel with the bevel up removes the initial material quickly, then a spokeshave to refine. (I’ve tried the jack plane but it’s a bit heavy to go back and forth on such a short section.) Then apply the cutter, inspect the marks it left where it stopped, thin the material up to the marks with a spokeshave, repeat. It took me about 1h per leg. I know things take what they take, but it feels like I am missing something and could be done much faster!
7
  • Other than third-party guidance out there online (that I know exists, hint hint) doesn't the manual itself cover this??
    – Graphus
    Commented Apr 8 at 6:55
  • The manual does not cover this. I have a couple of books that recommend the use of this tool, and both gloss over the exact steps. I’ve tried to find videos, but did not see one where the stock starts out much thicker than the tool accepts.
    – stanch
    Commented Apr 8 at 8:12
  • "but did not see one where the stock starts out much thicker than the tool accepts" I think your answer is right there, that you need to make the portion to be worked the correct size range for the tool; the PDF does emphasise, Use a piece no larger than the capacity of the tenon cutter to be used. (The maximum diameter of the workpiece is equal to the tenon diameter plus 11/2"). Ensure the end is cut square. Putting a substantial chamfer on the end of a piece of wood that is at or close to the upper limit of the tenon cutter’s capacity will make starting the cut much easier.
    – Graphus
    Commented Apr 9 at 9:02
  • That makes sense at the high level, but there are nuances. I found that starting with an approximately right sized cone requires constant fiddling as the cutter stops and the base of the cone needs to be thinned further. Starting with a cylinder should be easier cutter-wise, but getting to a reduced size cylinder is more fiddly (saw tenon shoulders to depth, split with a chisel in straight grain?).
    – stanch
    Commented Apr 9 at 9:21
  • By the way, I should have clarified that I am talking about the hand-powered cutter (leevalley.com/en-gb/shop/tools/hand-tools/…). The quote above is from the drill-powered one. This is important, because the drill-powered cutter produces a very different tenon (a cylinder with small tapered shoulders).
    – stanch
    Commented Apr 9 at 9:30

1 Answer 1

4

After some experimentation, some new tools and some math, I believe I have arrived at a reasonably efficient method. My last attempt took 13 minutes including marking, as opposed to over 1h in the original question :)

Which shape should I impart on the leg before applying the cutter?

A reduced cylinder is fine, however it’s no easier to create than a cone (maybe even harder) and gives more work to the tenon cutter.

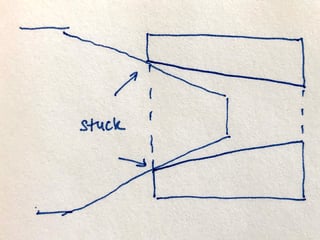
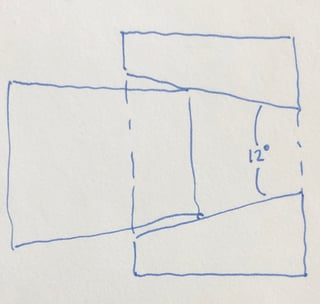
Trying to cut a cone with a matched included angle is a fool’s errand. If you get even a slightly steeper angle than needed, the cutter will eventually encounter a section thicker than its opening and will stop cutting. You will find yourself trimming down the offending sections again and again. To illustrate (exaggerated, not to scale):

The cutter is stuck

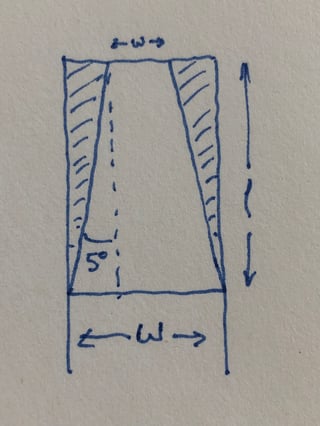
Starting with a lower-angled cone (say, 10˚) is the way to go (drawing not to scale):

Lower angle tenon

What is an efficient way to achieve the above shape?

Some math

First, determine the length of your 10˚ cone. You will need to know the width of your stick (W) and the desired diameter of the tip (w). For the latter, I went with 17 mm, which is a little over 5/8”.

The math

To calculate the length, l, use the following formula: l = (W - w)/2 / tan(10˚/2). For example, with a 37 mm wide stick this yields (37-17)/2 / 0.087, which is about 115 mm.

Marking out

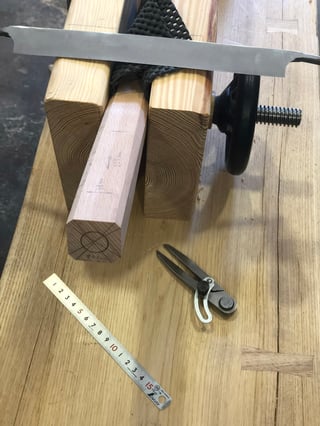
Transfer the cone length and the tip diameter to the stick:

Marking out

Roughing out

Taper to the marks with a drawknife.

First pass Done

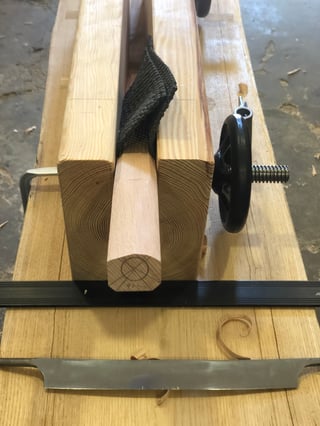
Make sure the “shoulders” all around the cone are straight or (failing that) ever so slightly concave, but never convex (otherwise you might have an overly thick section the cutter can’t enter):

Straight shoulders

Applying the cutter

Now use the tapered tenon cutter. If it gets stuck on an overly thick section, find the offending bumps and trim them away with a drawknife:

Offending bumps

Done

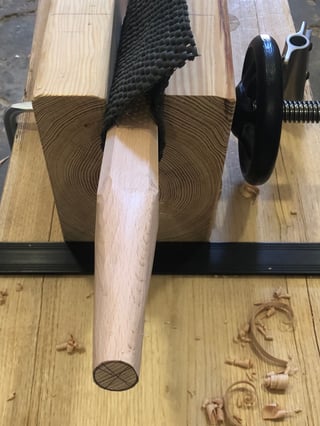
Once you reach your desired depth, you are done!

Final tapered tenon

6
  • 1
    Thanks for coming back to post your solution! Got to admit, the fact that the tenon cutter gets stuck on small bumps is disheartening. I'd like to think that it would pare those down on its own, once you've got the tenon to the right general shape. It is, I guess, what it is, though.
    – FreeMan
    Commented May 31 at 12:28
  • I think I was not very clear… It gets stuck when it encounters a diameter larger than the opening. If you pick an angle that’s too big (imagine 45 degrees for an exaggeration), then the stick gets thicker than the opening too fast, so the full cutter does not fit. This is only an issue because the initial stick is so wide. If the entire stick were thin enough (below 3 cm), the cutter would never get stuck.
    – stanch
    Commented May 31 at 12:54
  • Ah, gotcha! Yeah, that does make more sense...
    – FreeMan
    Commented May 31 at 13:18
  • I’ve clarified the text and added an illustration.
    – stanch
    Commented May 31 at 13:23
  • This is excellent, thanks so much for coming back and self-answering!
    – Graphus
    Commented Jun 1 at 6:05

Your Answer

By clicking “Post Your Answer”, you agree to our terms of service and acknowledge you have read our privacy policy.

Not the answer you're looking for? Browse other questions tagged or ask your own question.